This guide provides precise instructions for integrating GoHighLevel with Net Engine. Follow the steps below to seamlessly connect the two applications and enhance your workflow.
Go to app.netengine.co
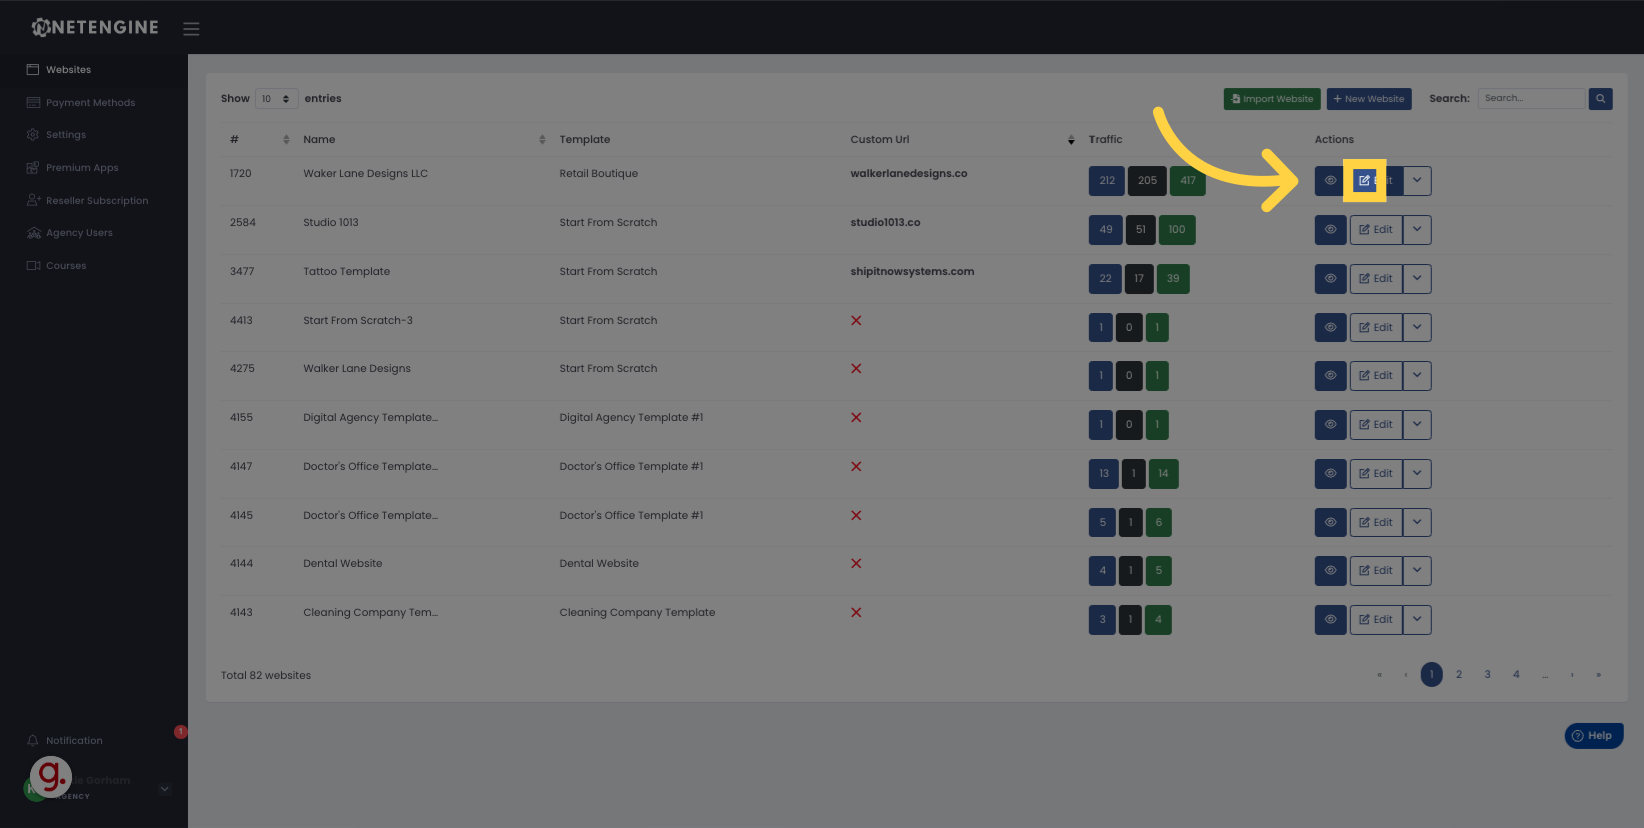
1. Click on Edit for the website you want to add the integration
Click on Edit for the website you want to add the integration
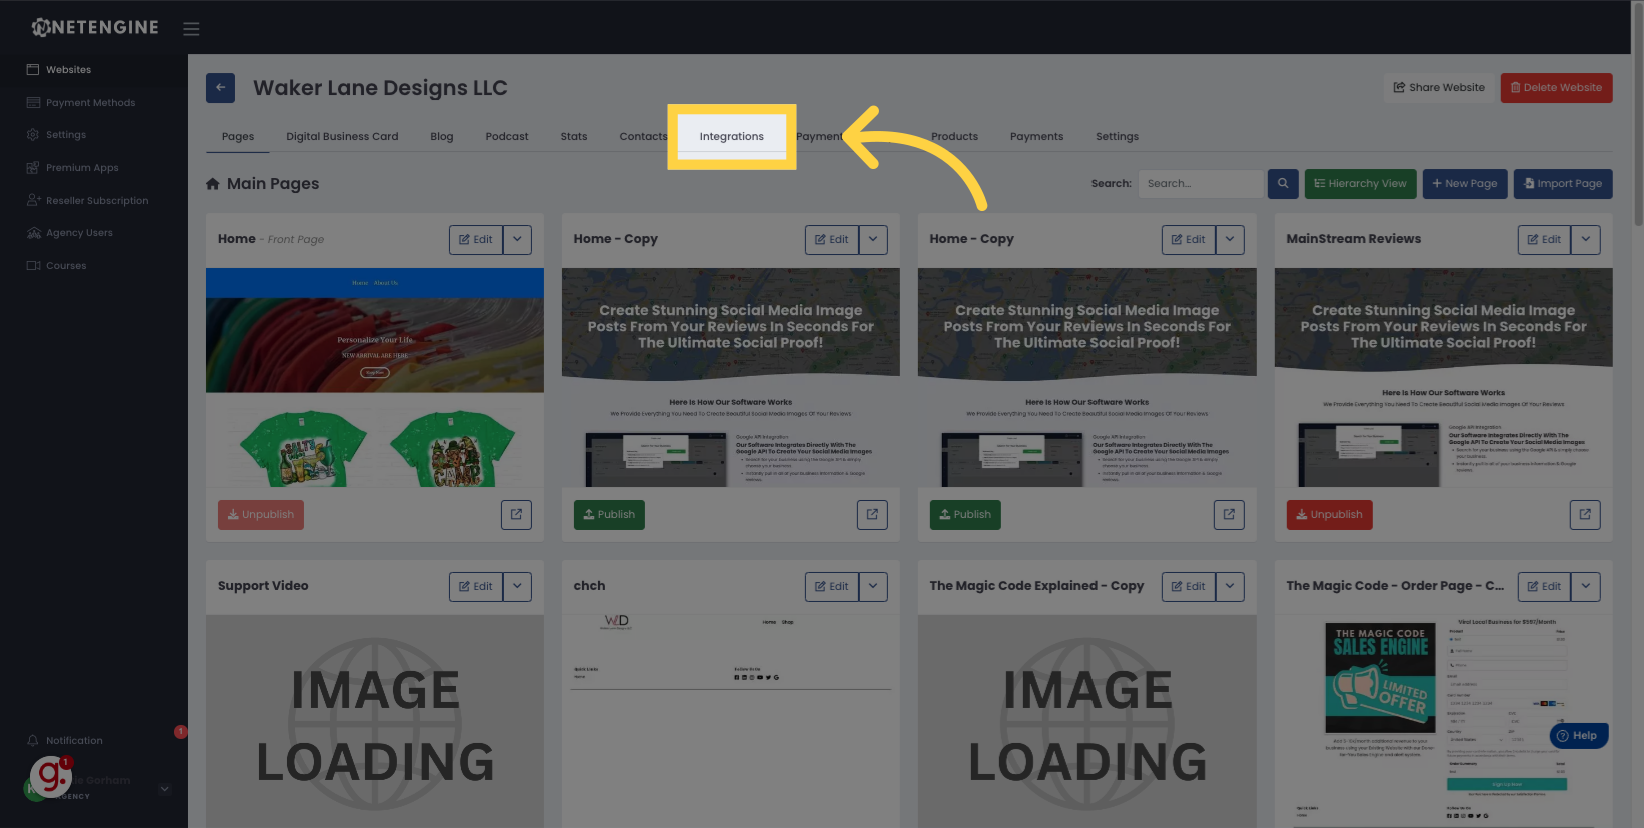
2. Click "Integrations"
Navigate to the "Integrations" tab.
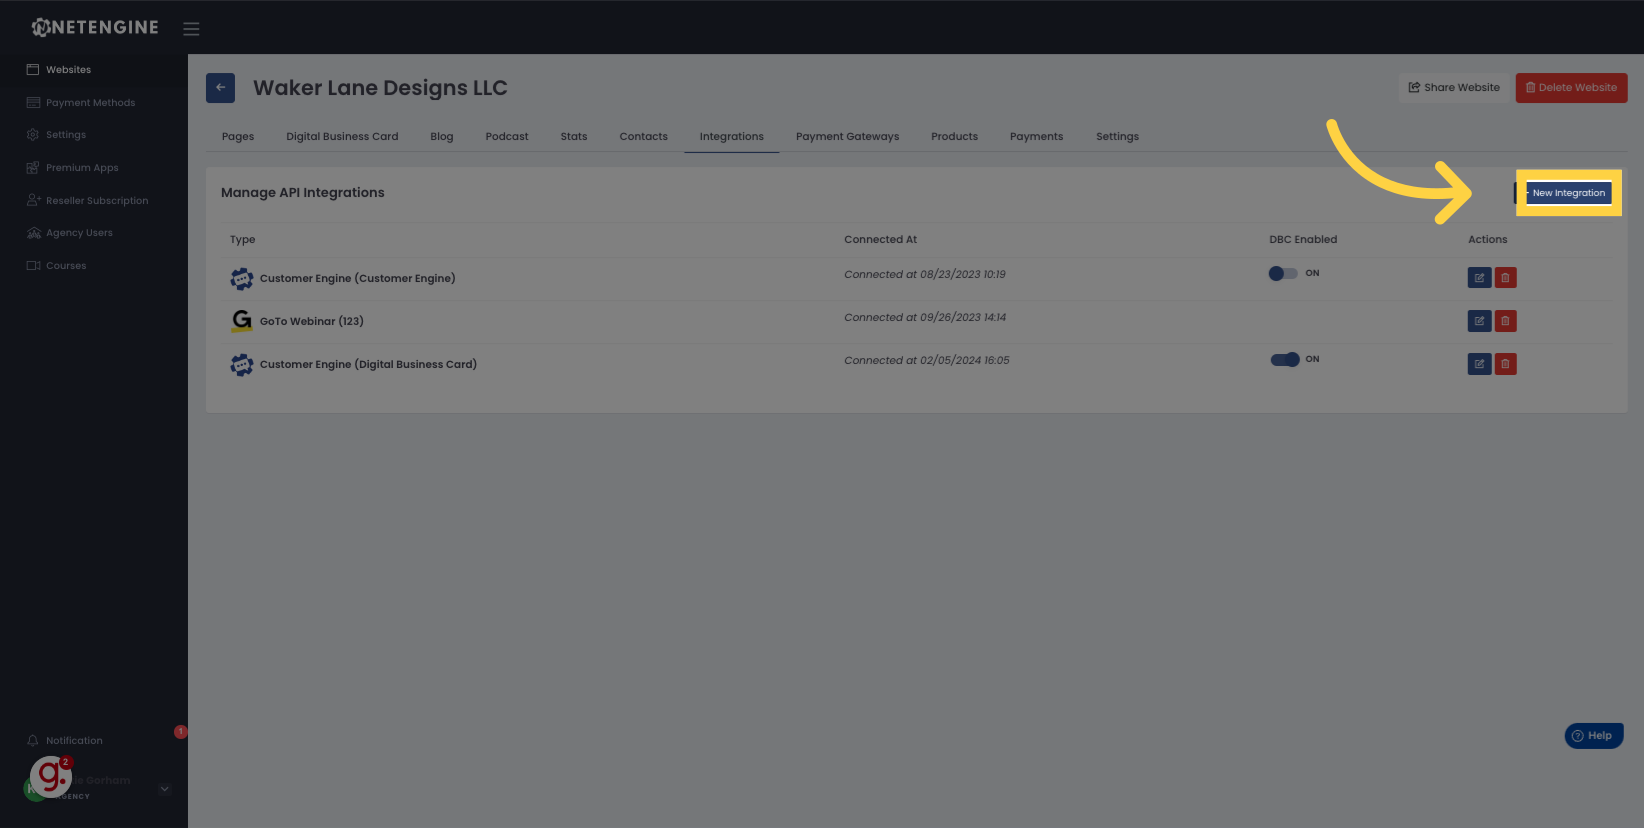
3. Click "New Integration"
Select the option to create a new integration.
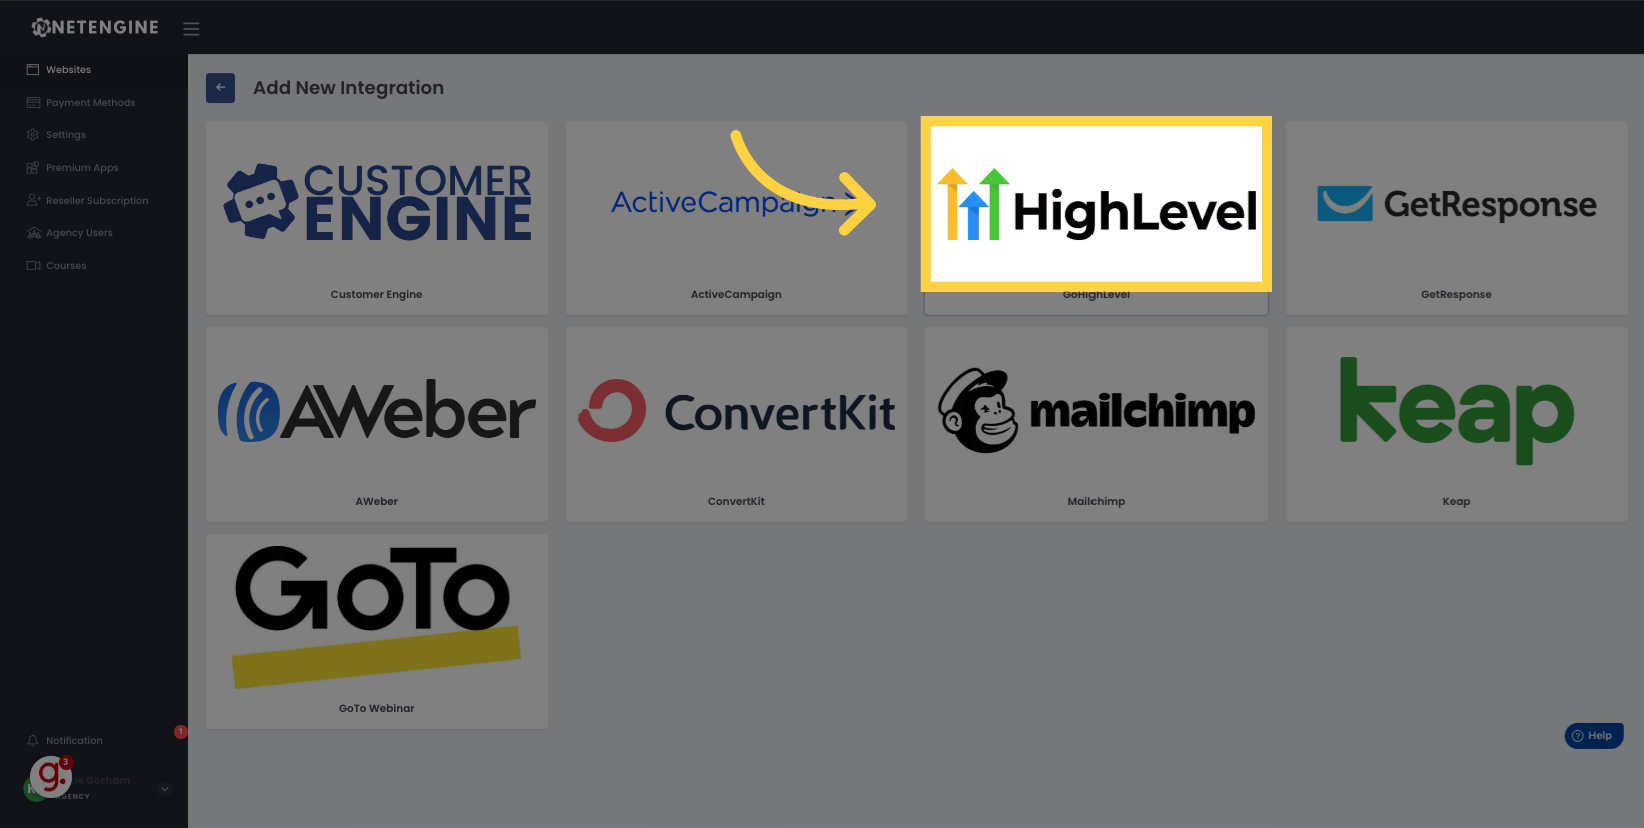
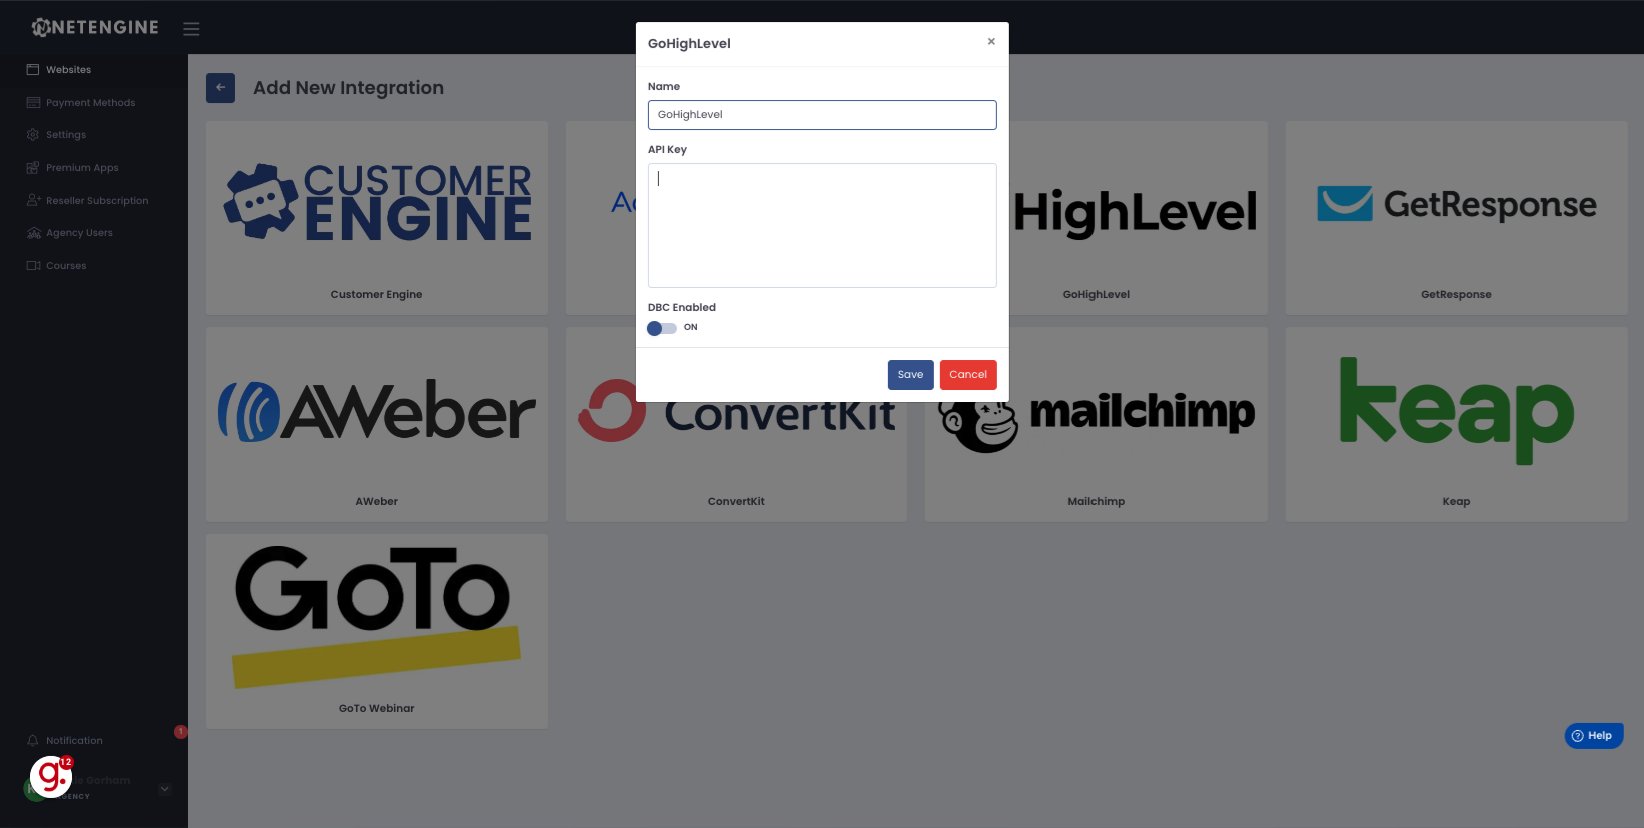
4. Click GoHighLevel
Click on GoHighLevel
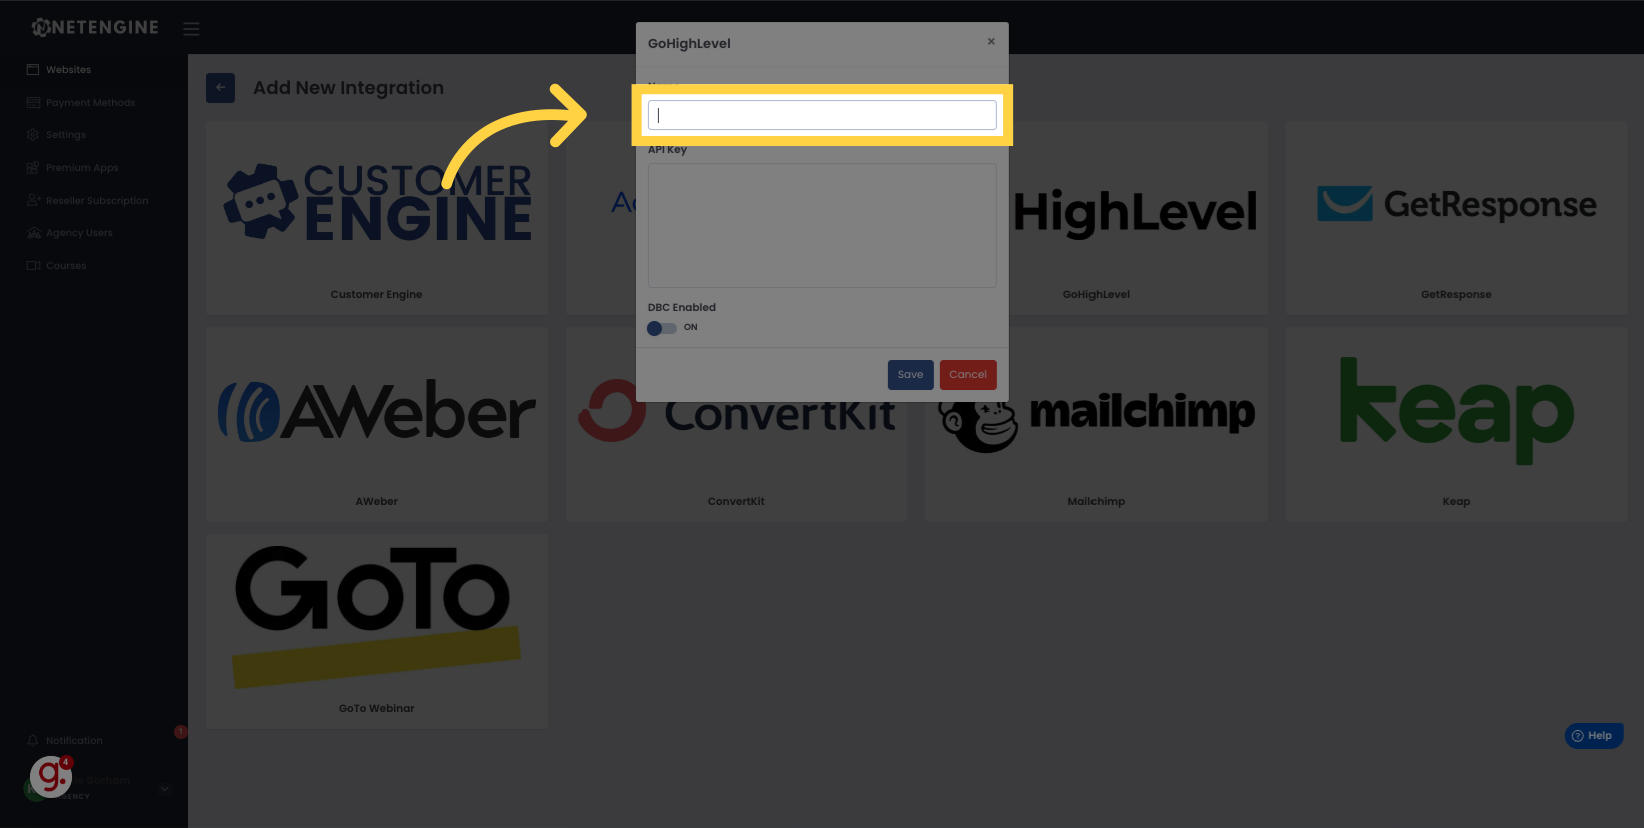
5. Name Integration
Name the Integration
6. Switch to "app.gohighlevel.com"
Switch to "app.gohighlevel.com"
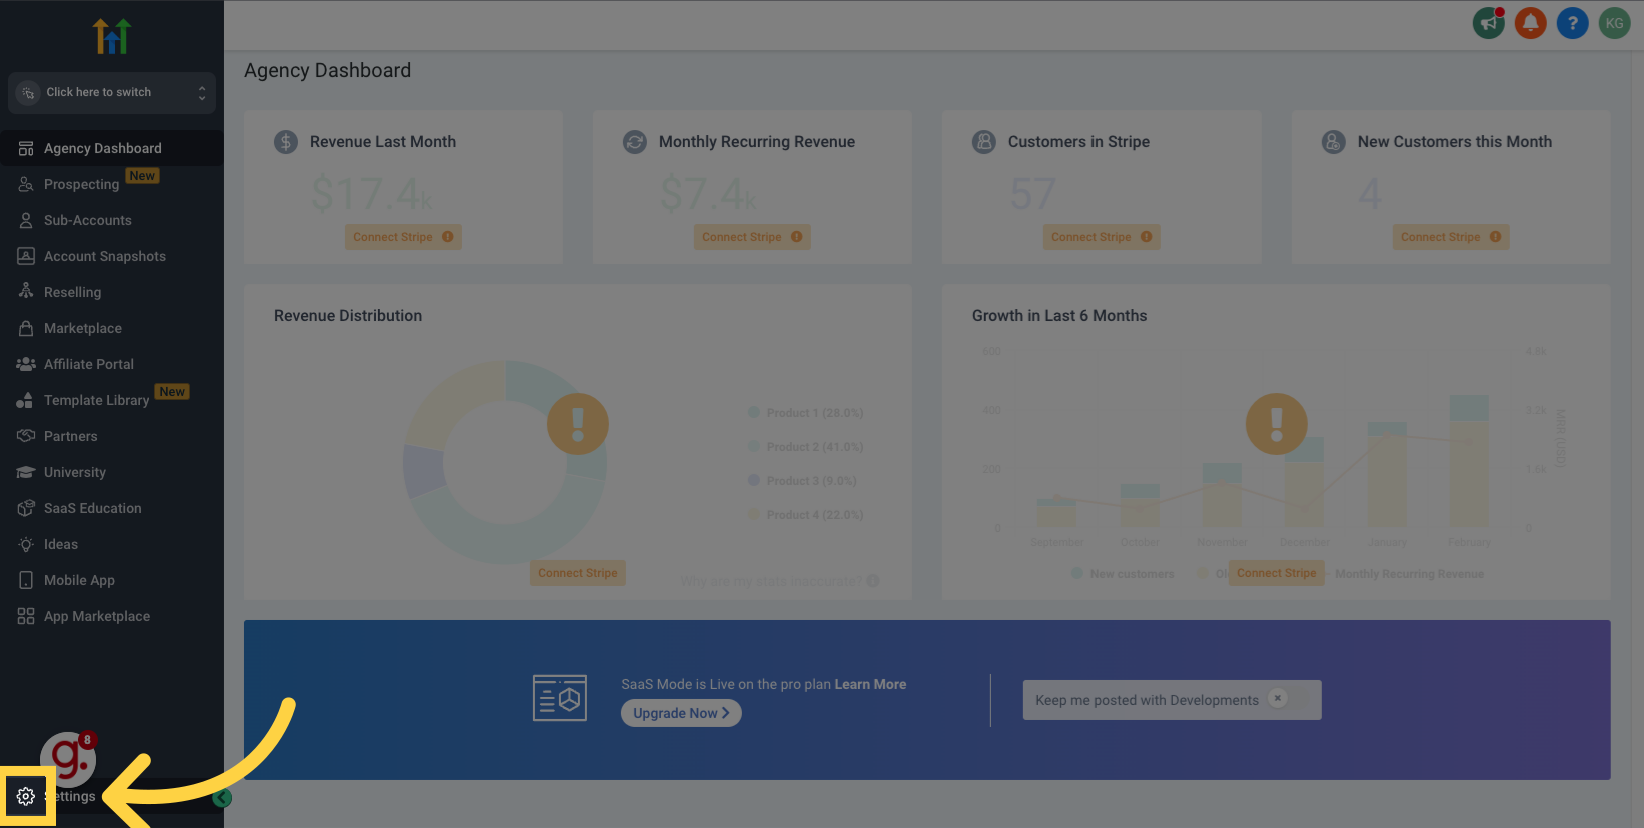
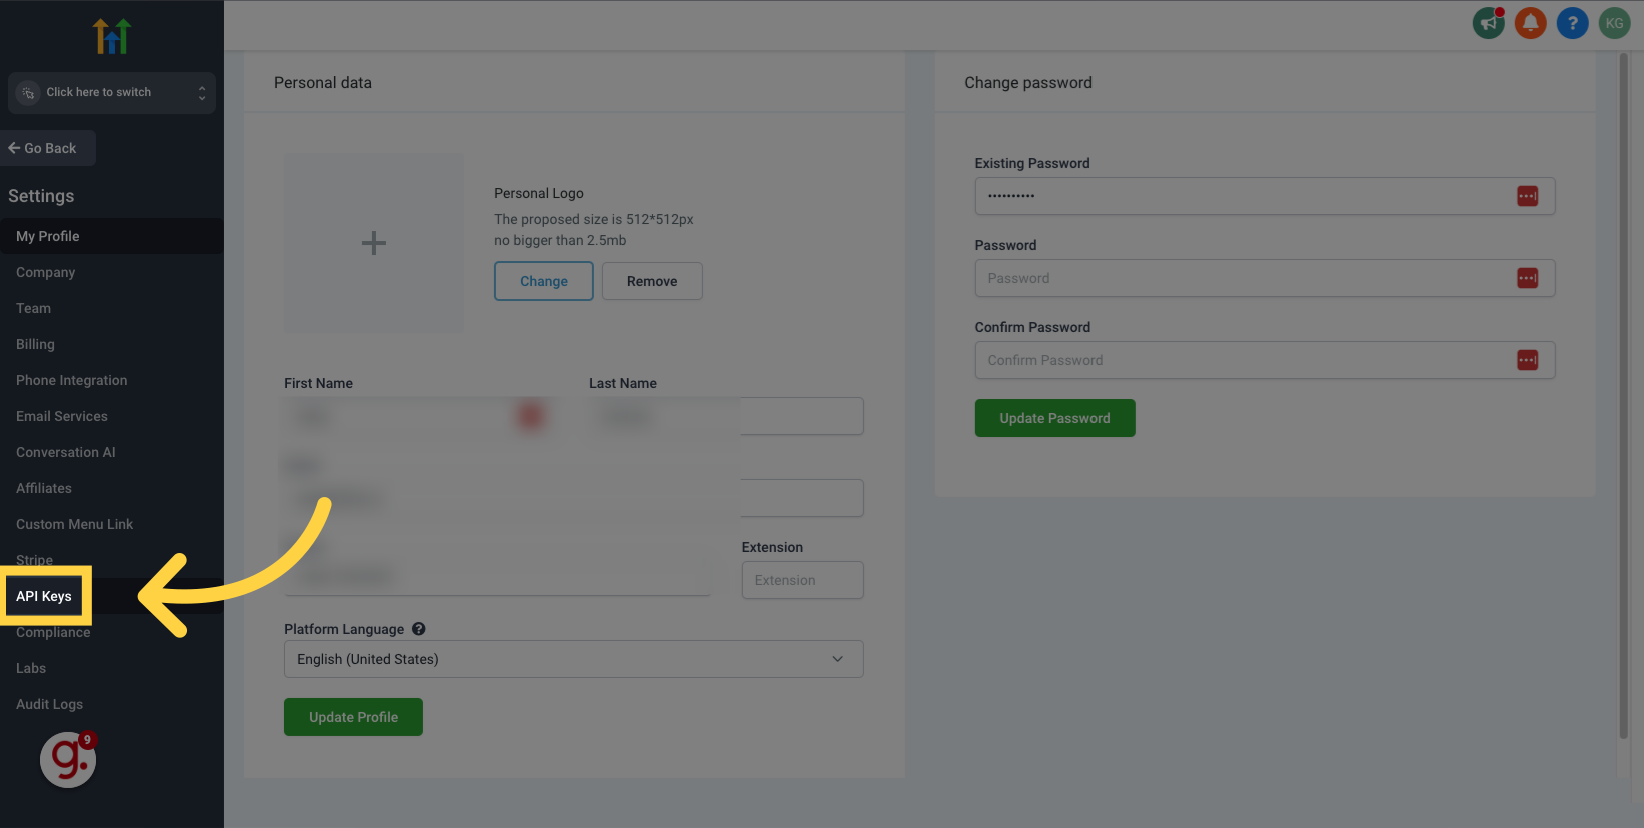
7. Click Settings
Click on Settings
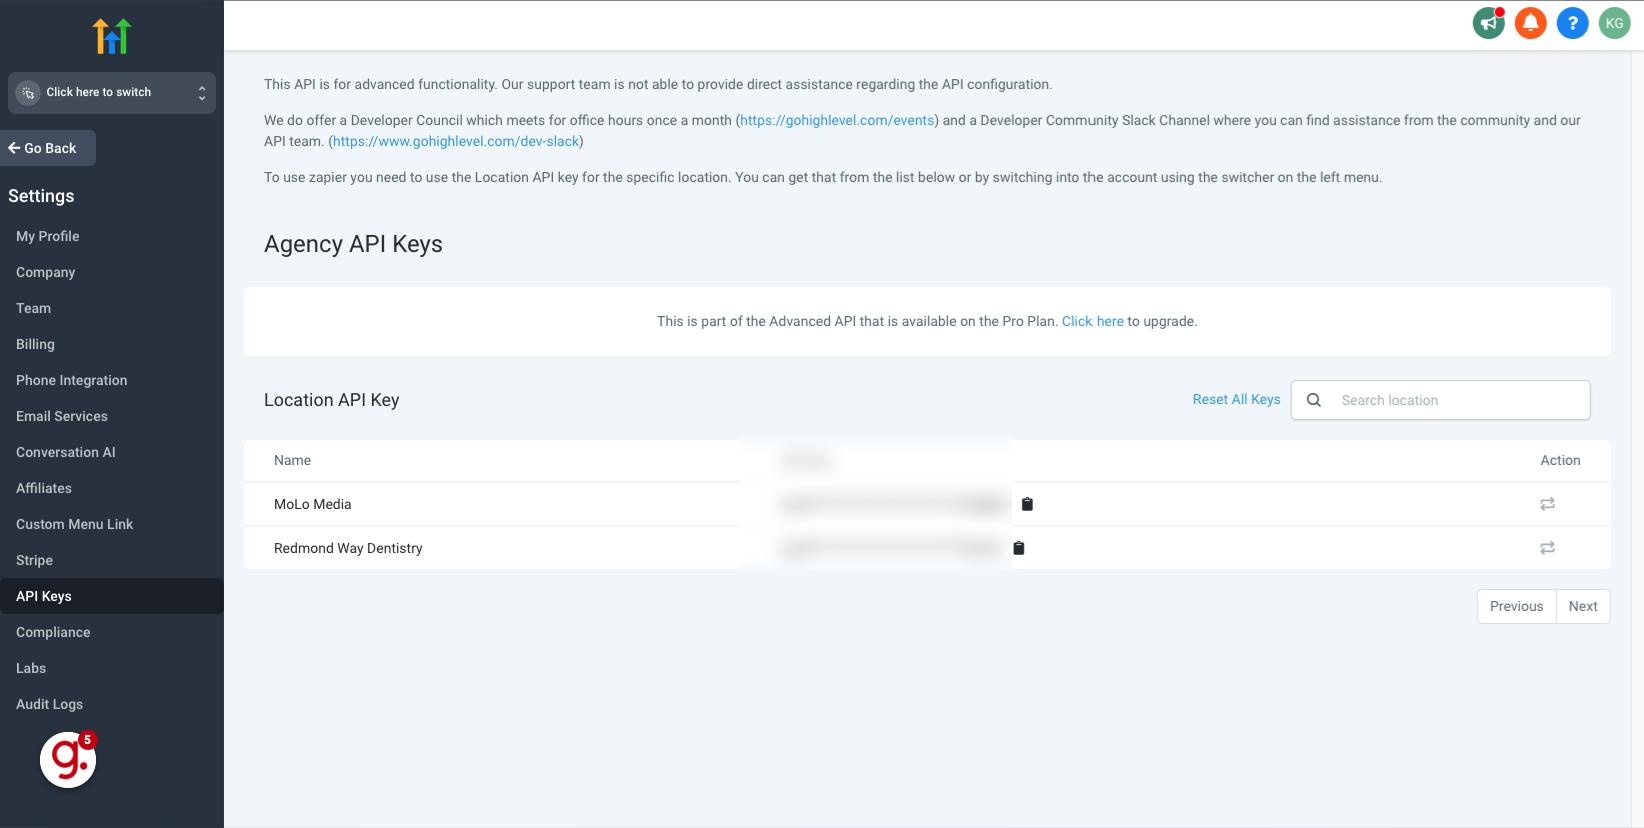
8. Click "API Keys"
Select the "API Keys" option.
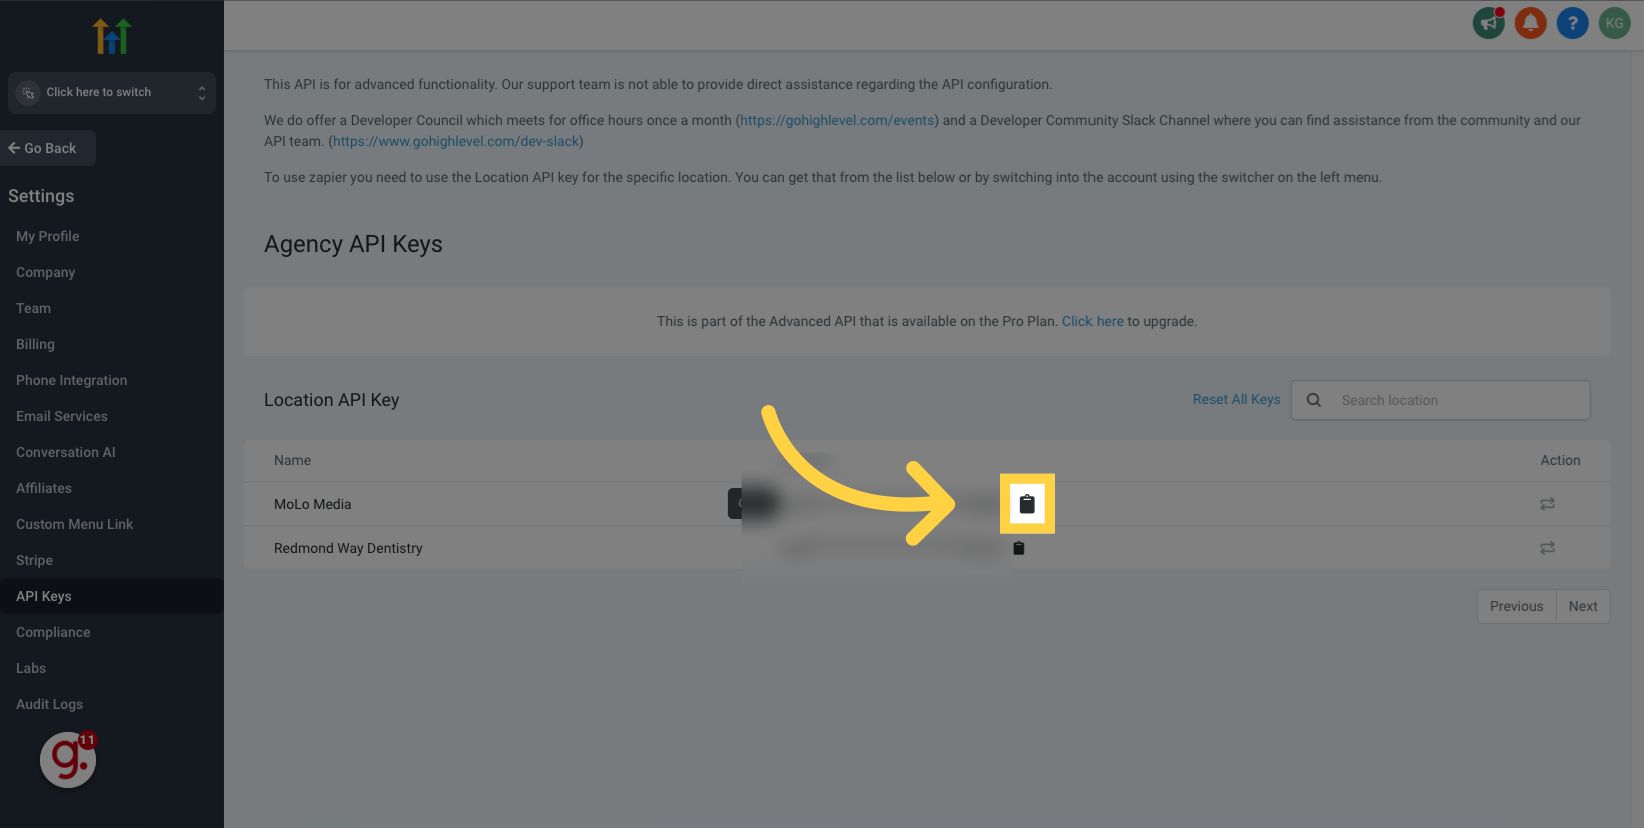
9. Copy API Key
Copy API Key
10. Switch to "app.netengine.co"
Navigate to "app.netengine.co"
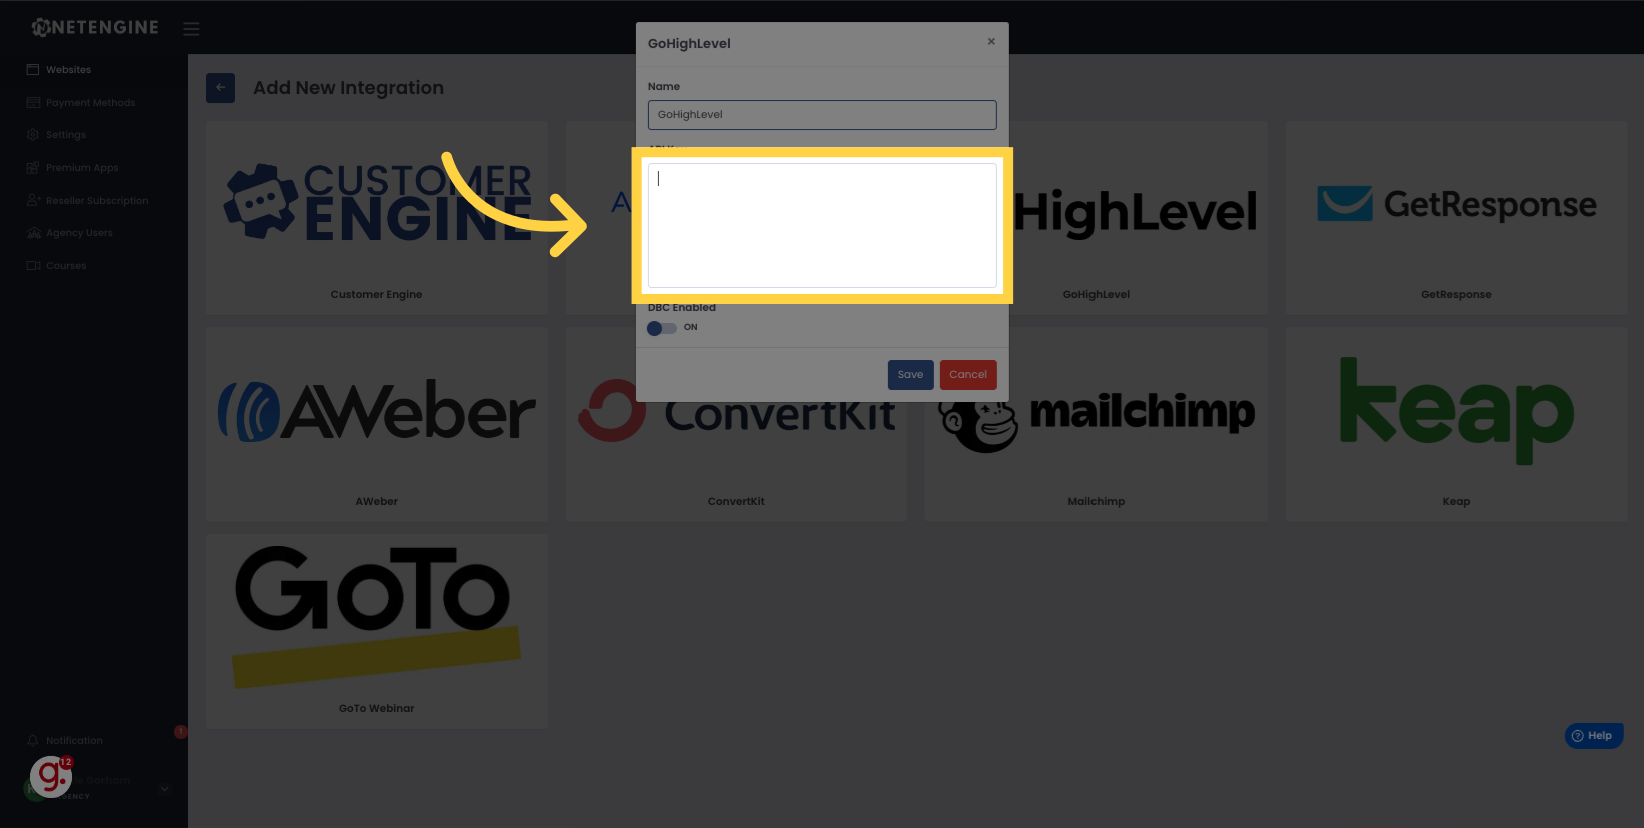
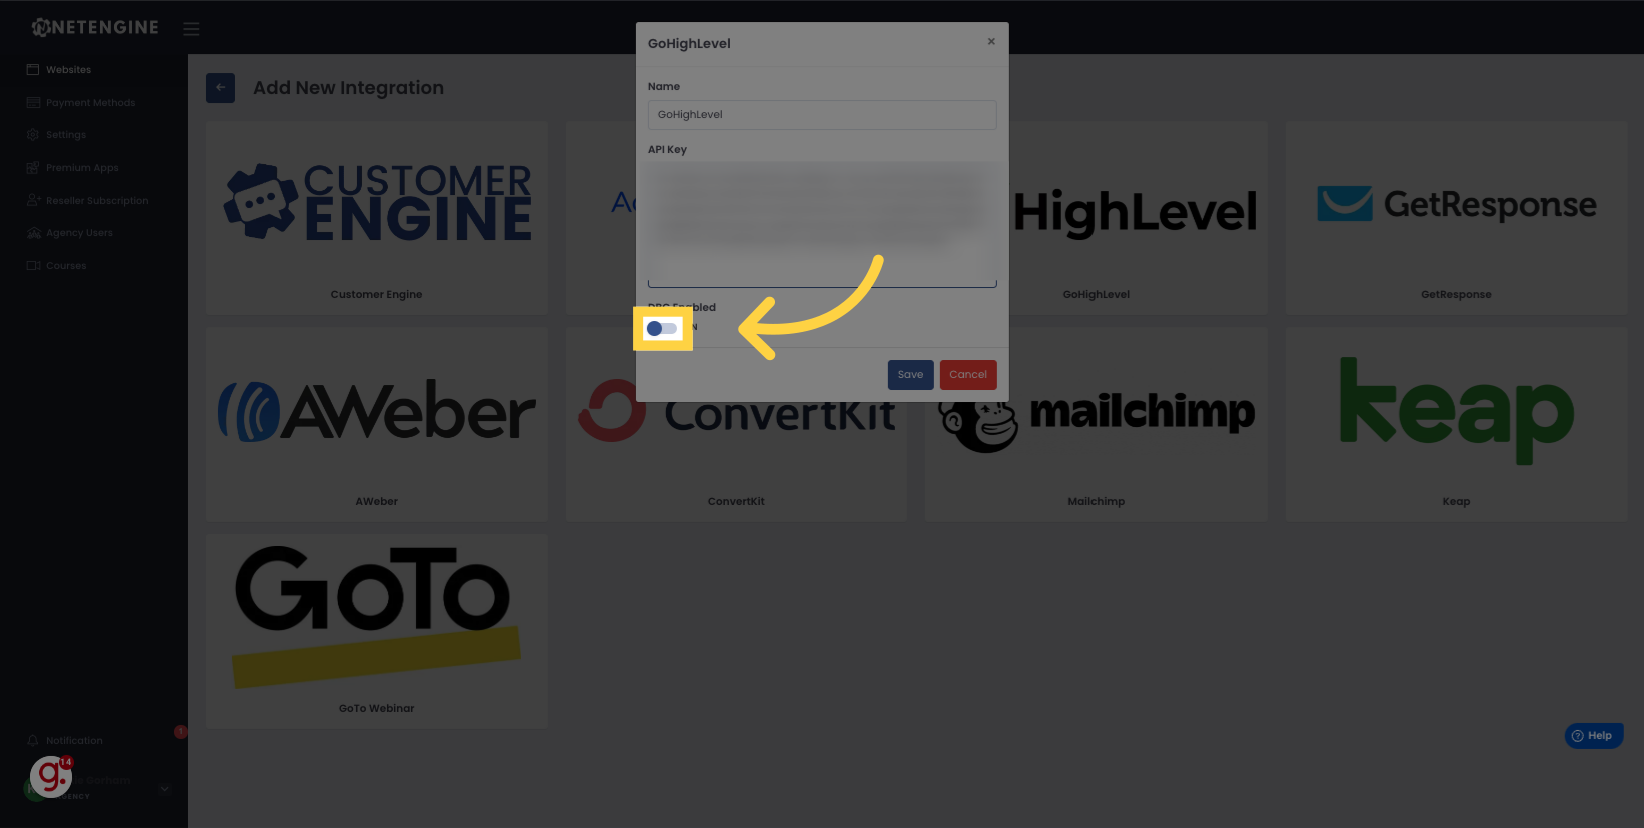
11. Paste API Key
Paste your API key here
12. Click "on"
Turn on DBC mode
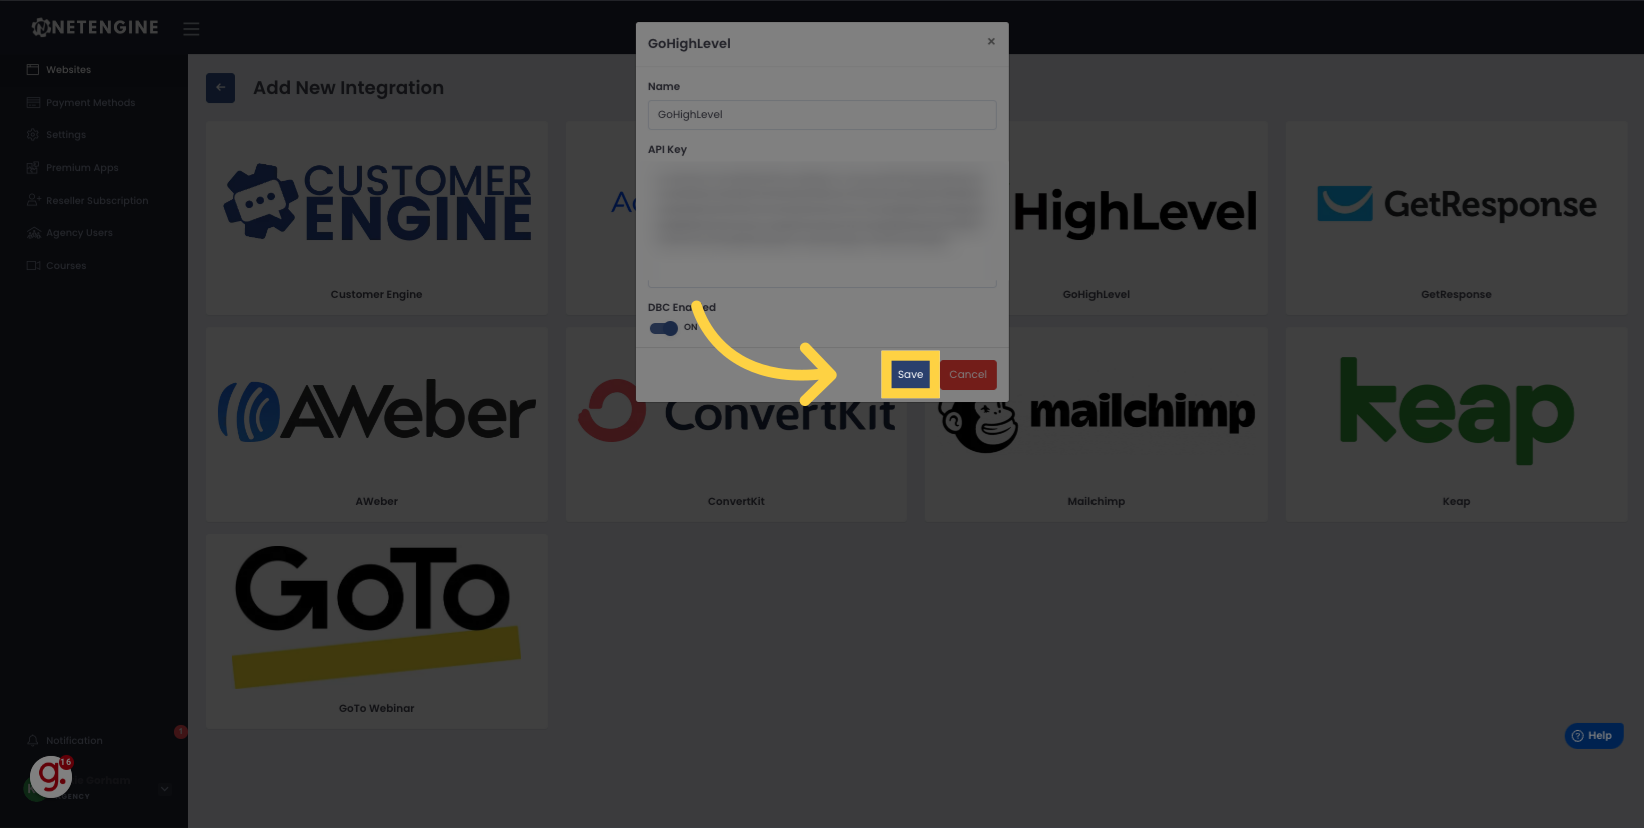
13. Click "Save"
Save the changes by clicking on the "Save" button.
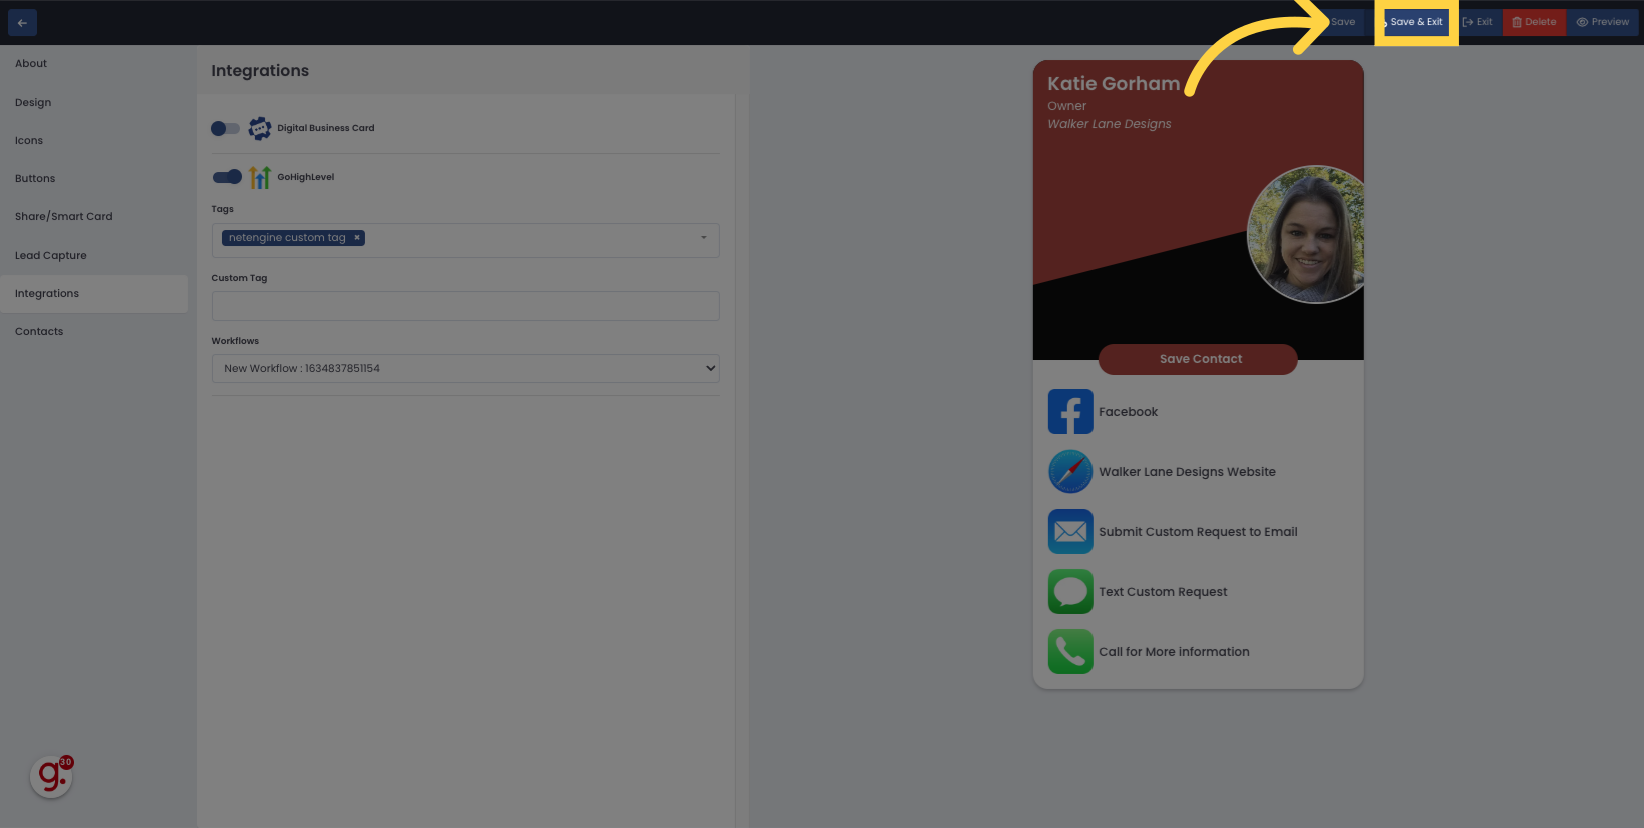
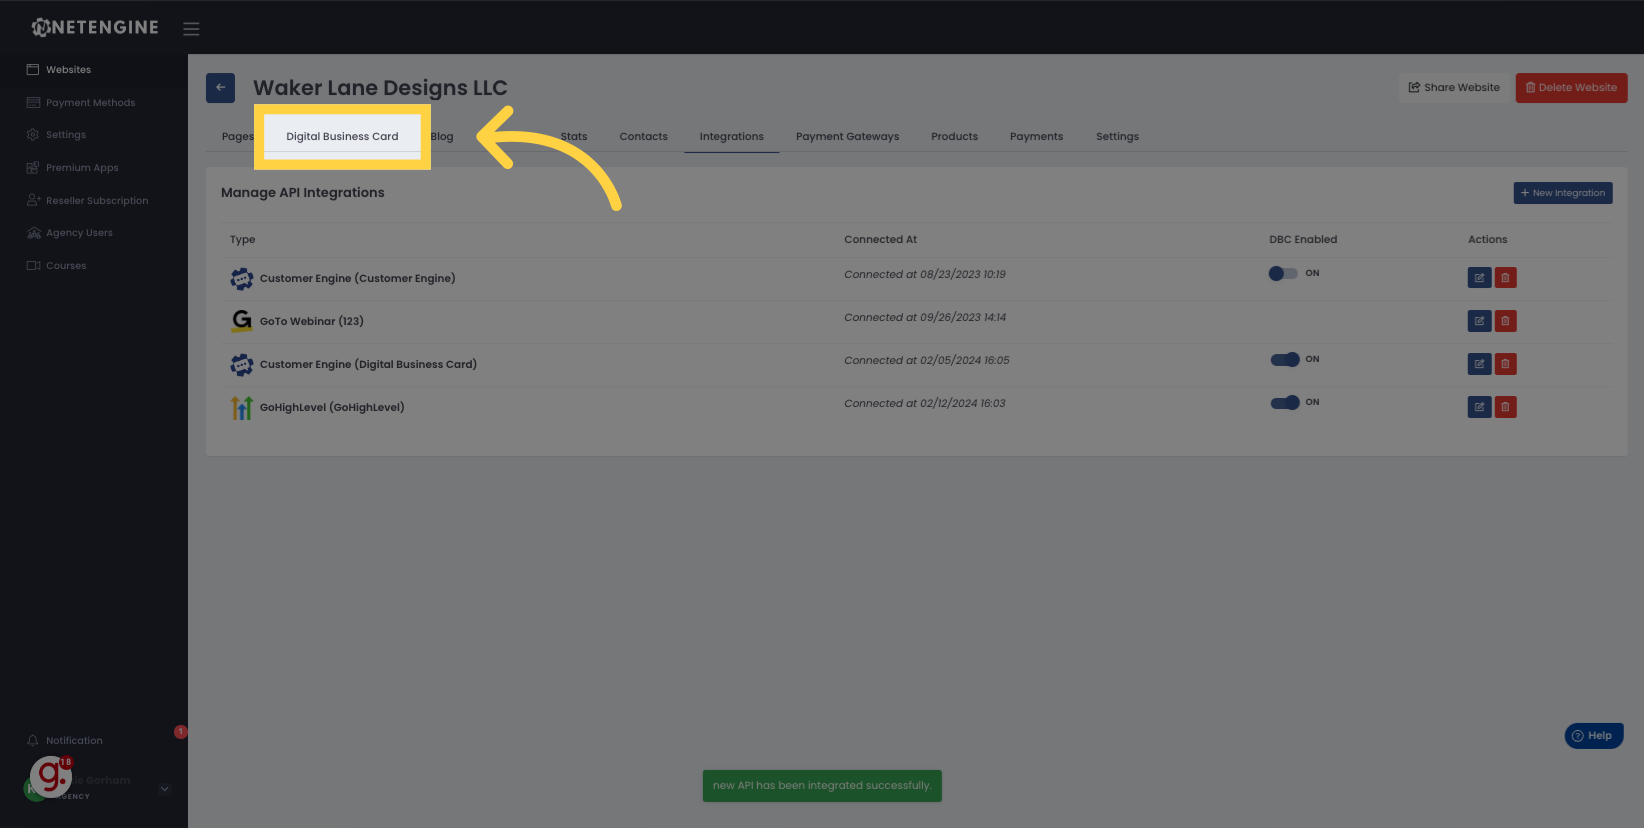
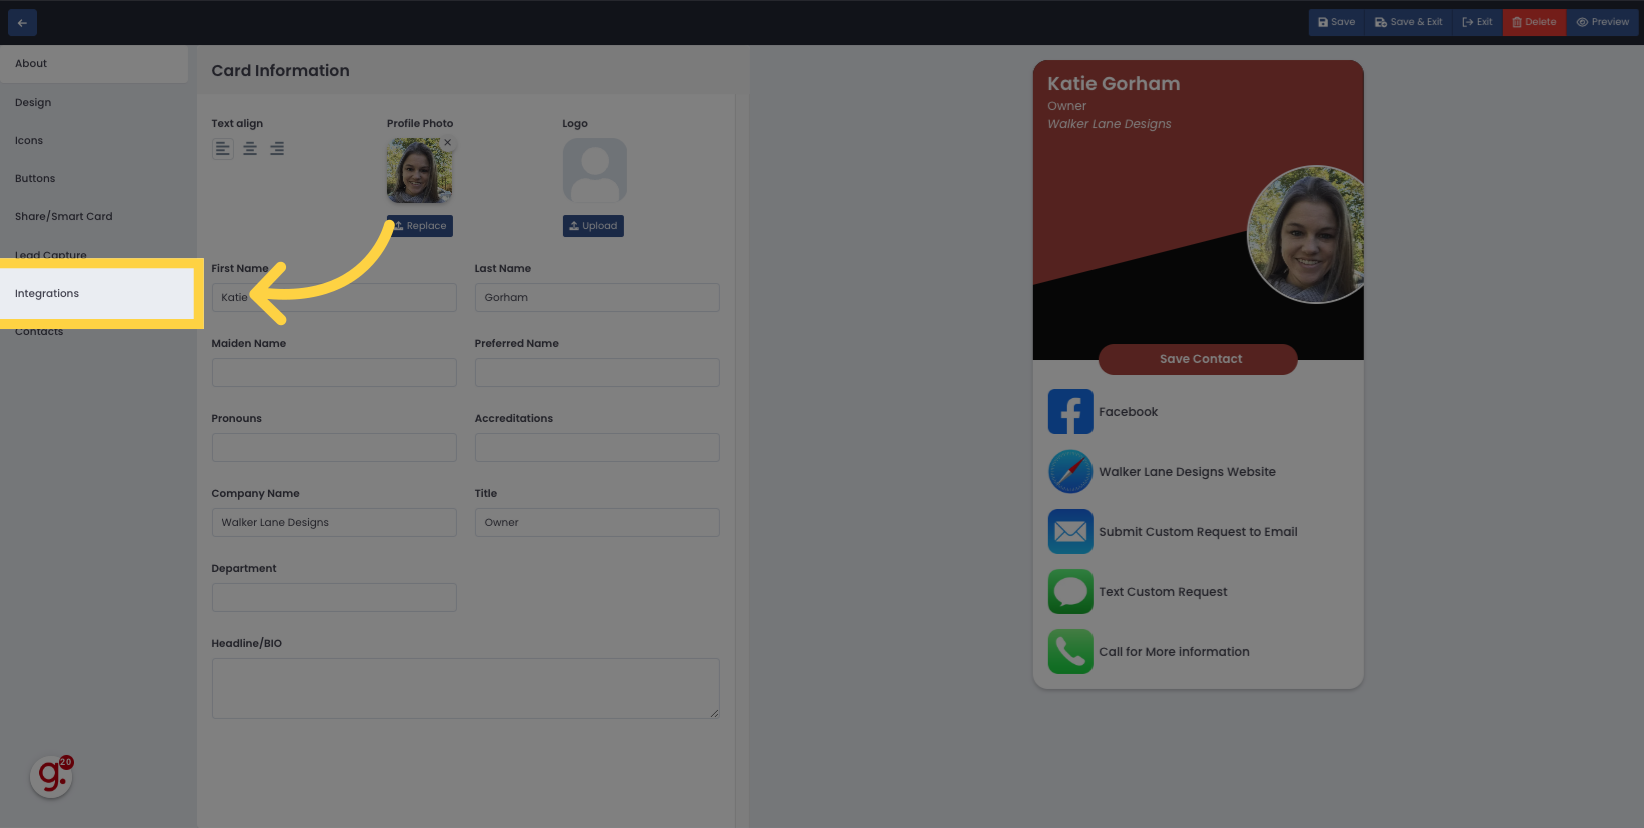
14. Click "Digital Business Card"
Select the "Digital Business Card" option.
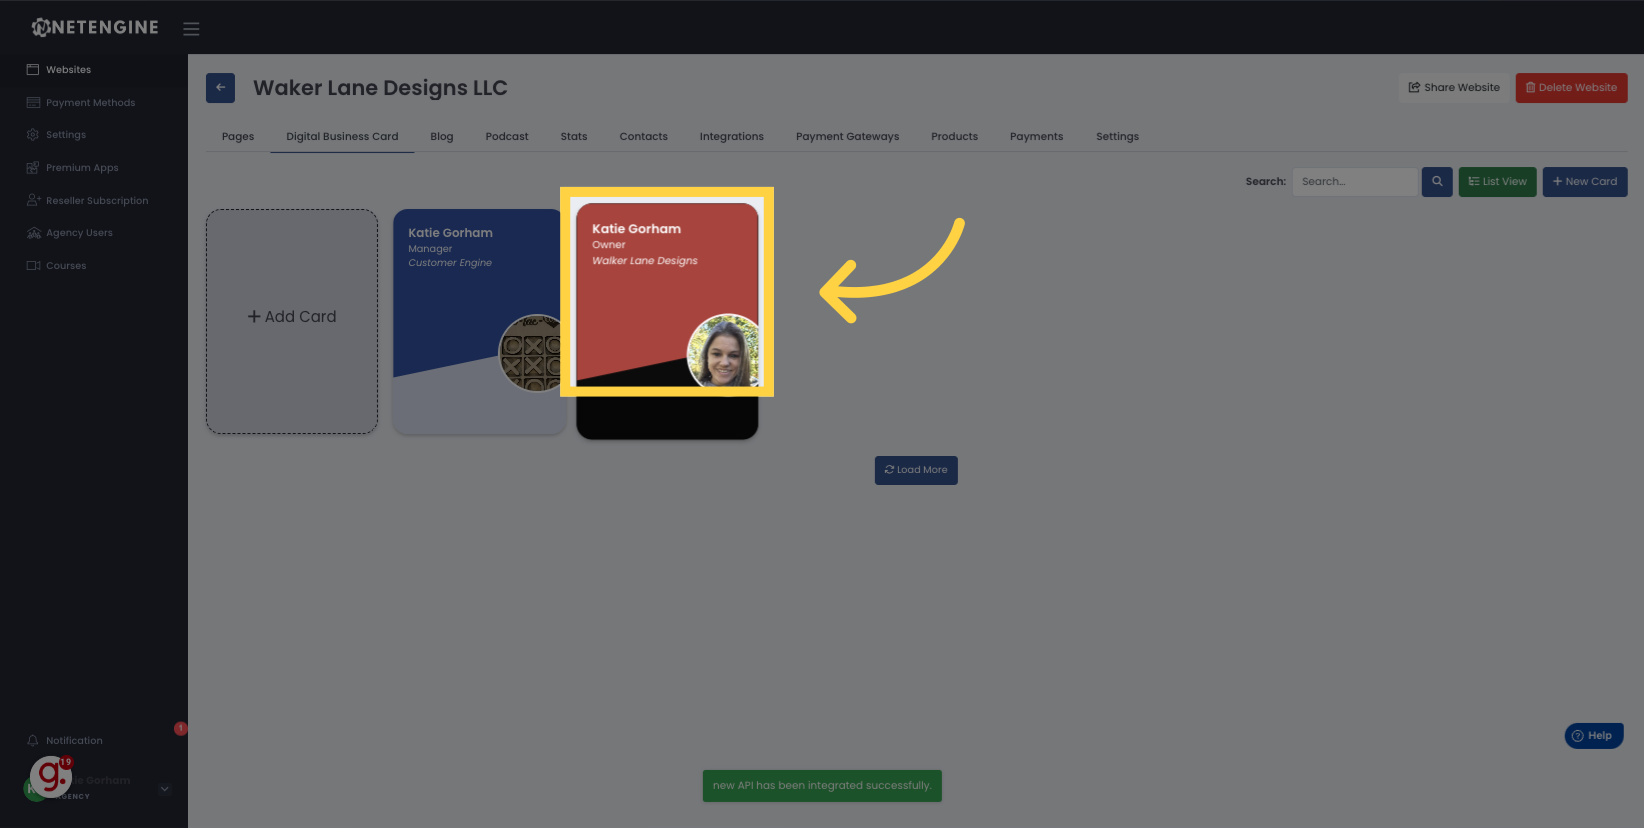
15. Click the digital business card you want to use.
Choose the specific business card entry.
16. Click "Integrations"
Navigate to the "Integrations" section.
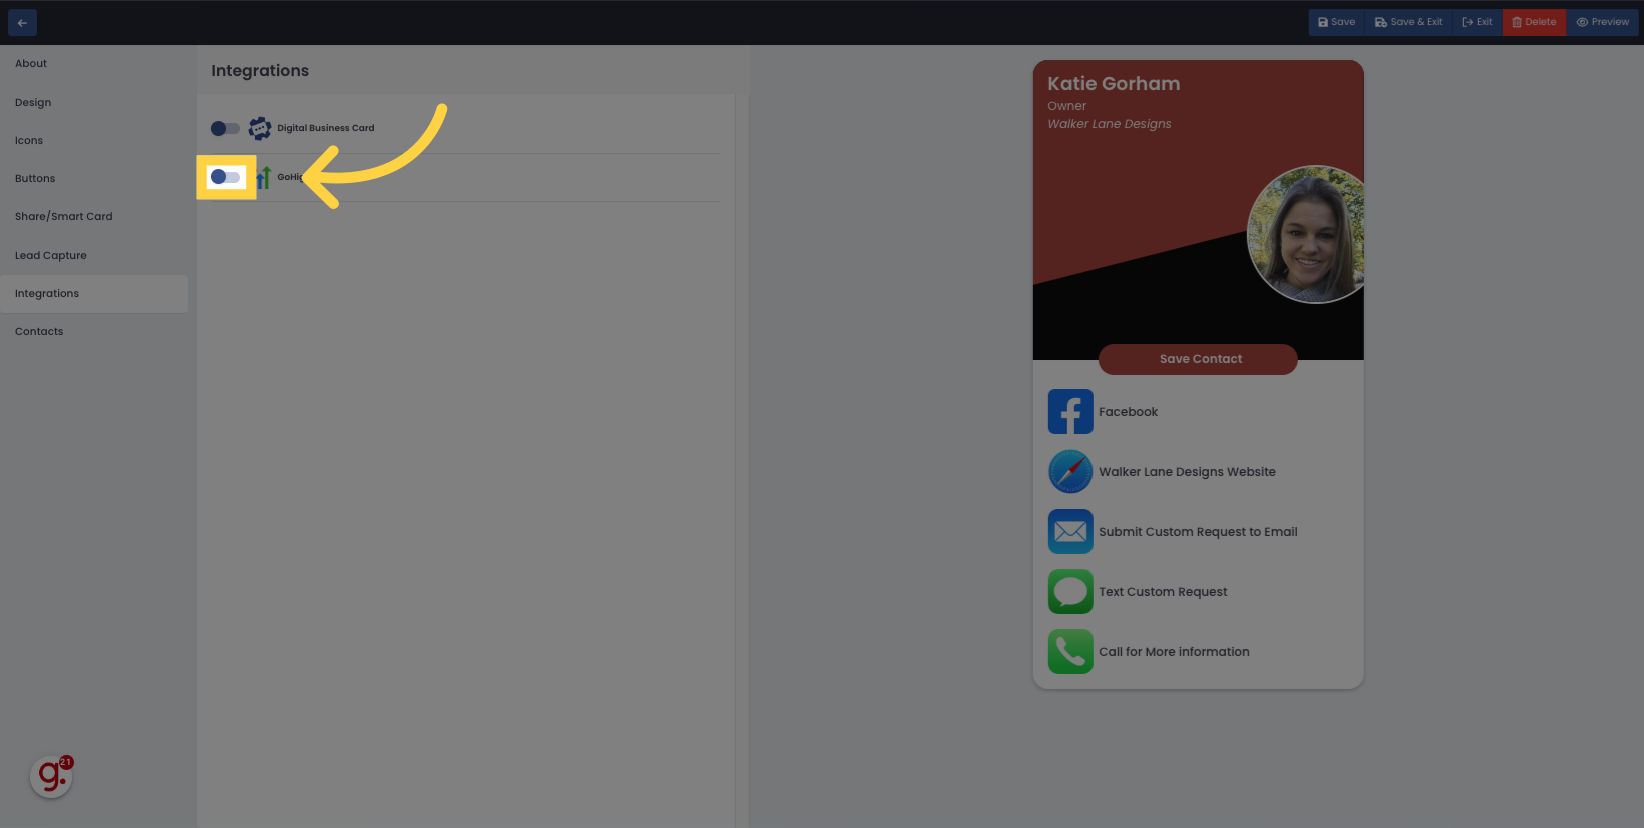
17. Turn the integration on
Select the "on" option.
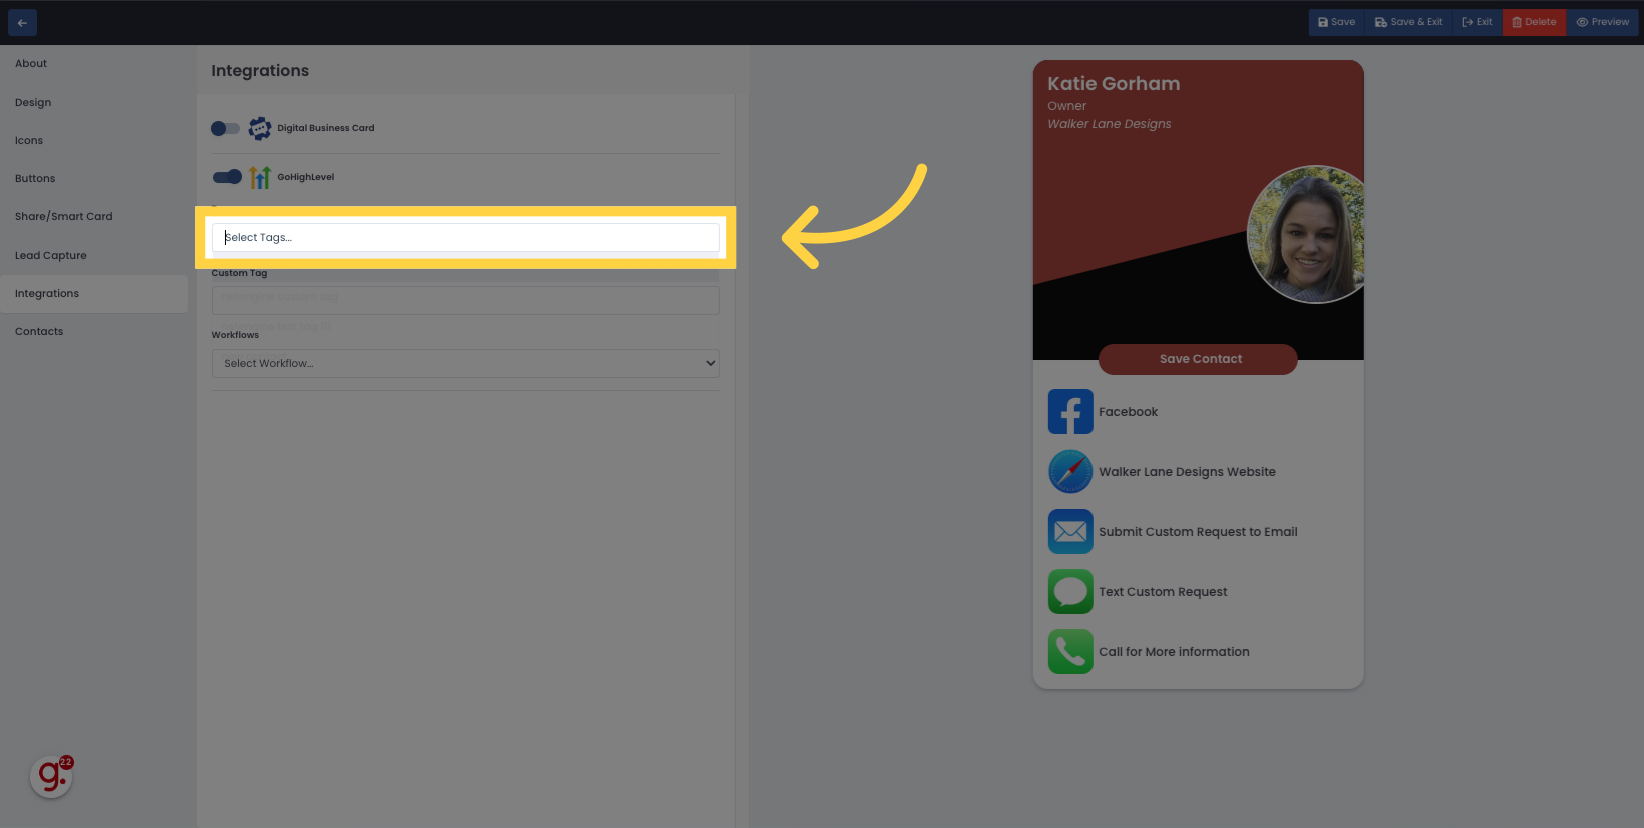
18. Choose the tag to use
Select the tag you want for the automation
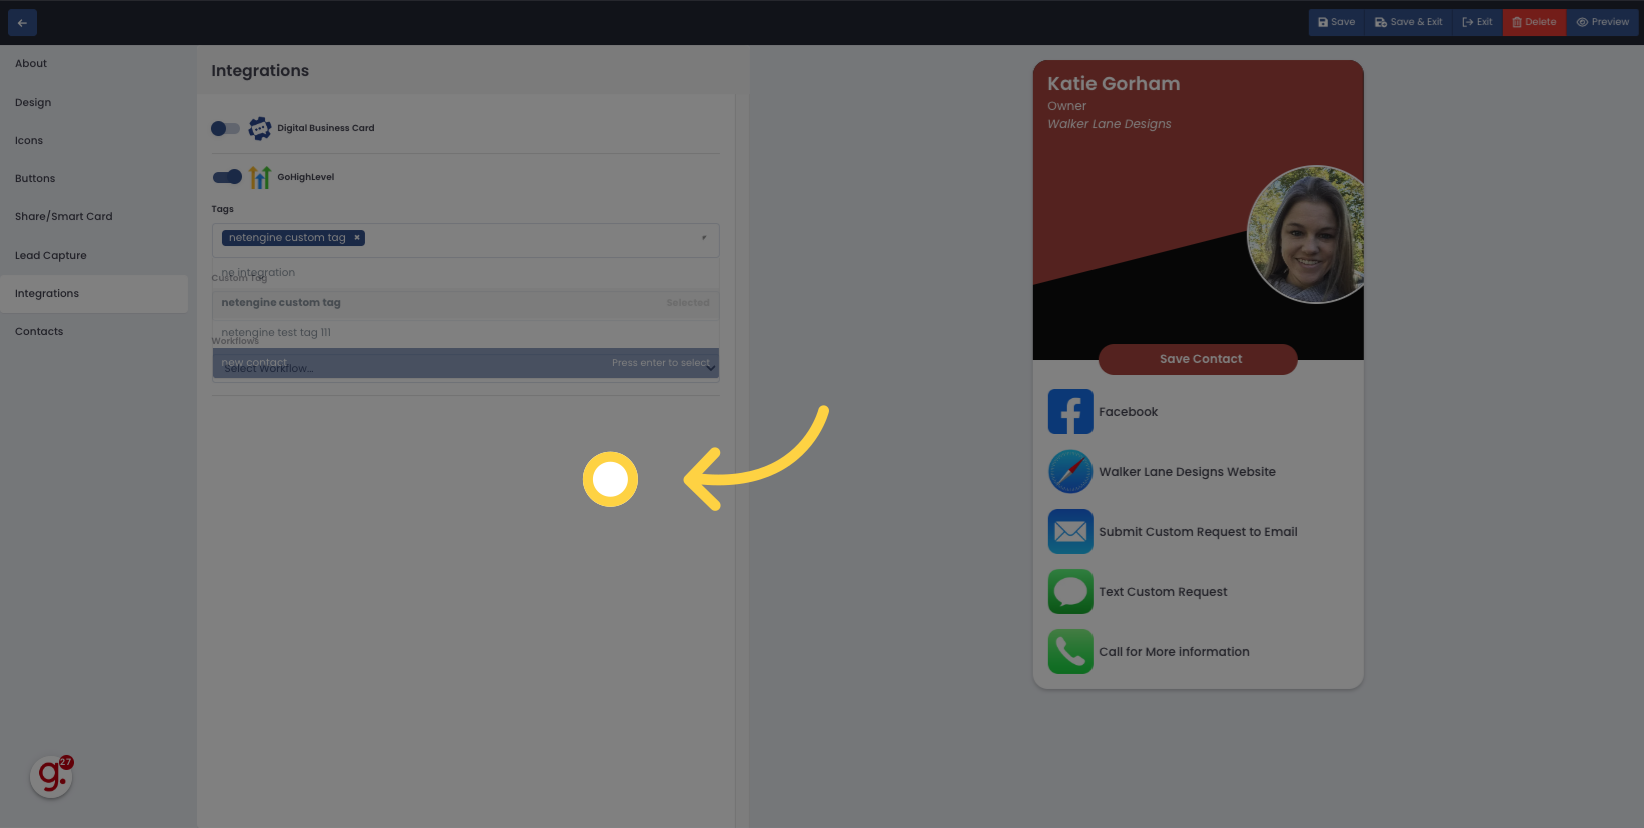
19. Choose the automation you want from the list.
Choose the automation you want from the list.
20. Click "Save & Exit"
Save the changes and exit by clicking on the "Save & Exit" button.