How to create a menu from scratch
This guide will walk you through creating a customized menu in Netengine. Follow these precise instructions to add and organize menu items for a seamless user experience.
Go to app.netengine.co
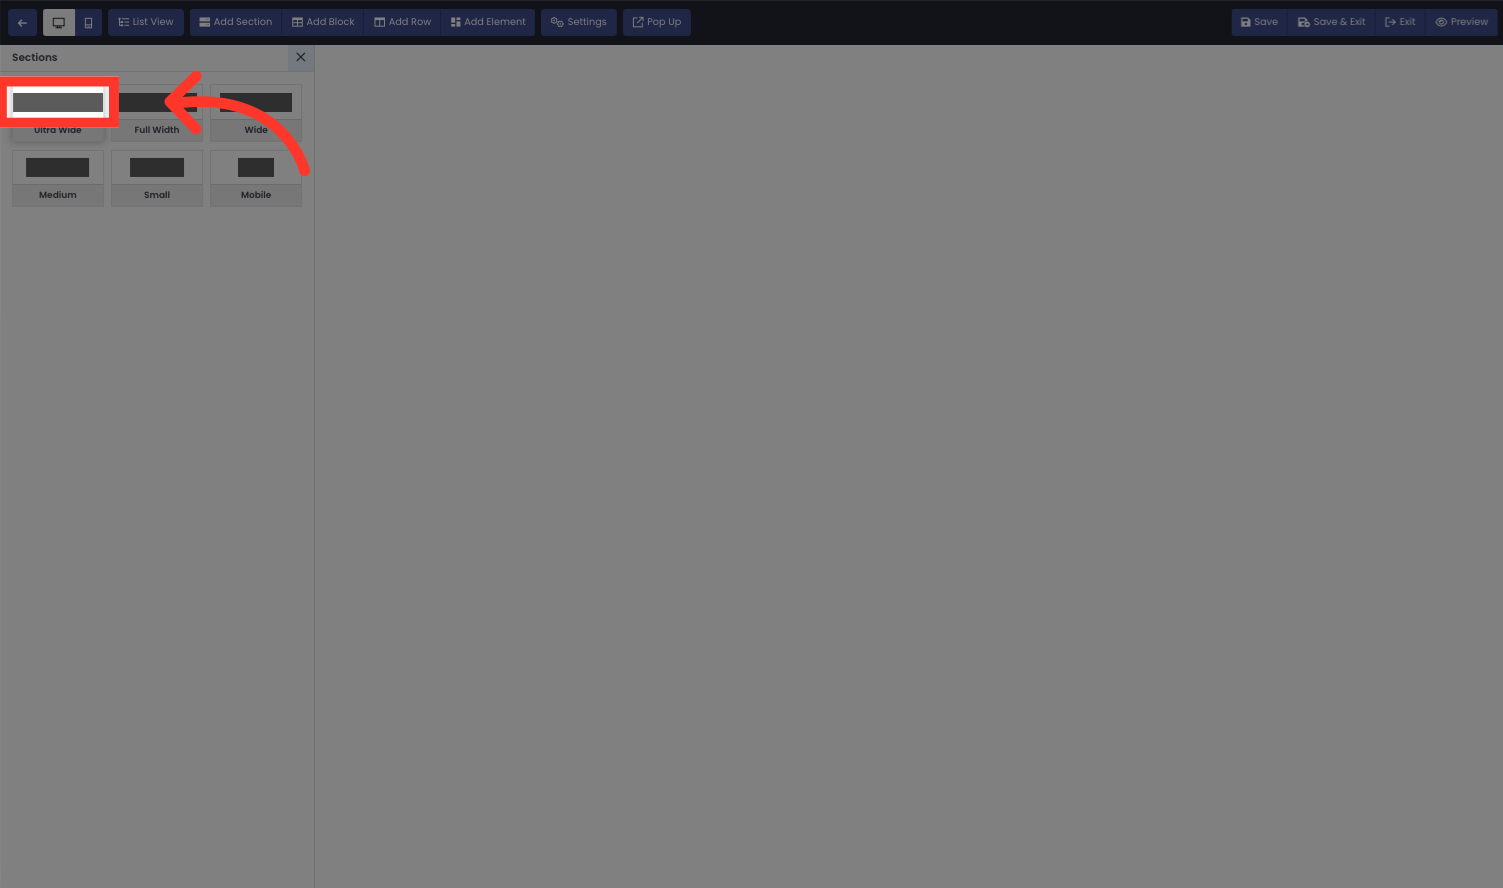
1. Click on Sections then Choose Your desired Section Width
Click on Sections then Choose Your desired Section Width
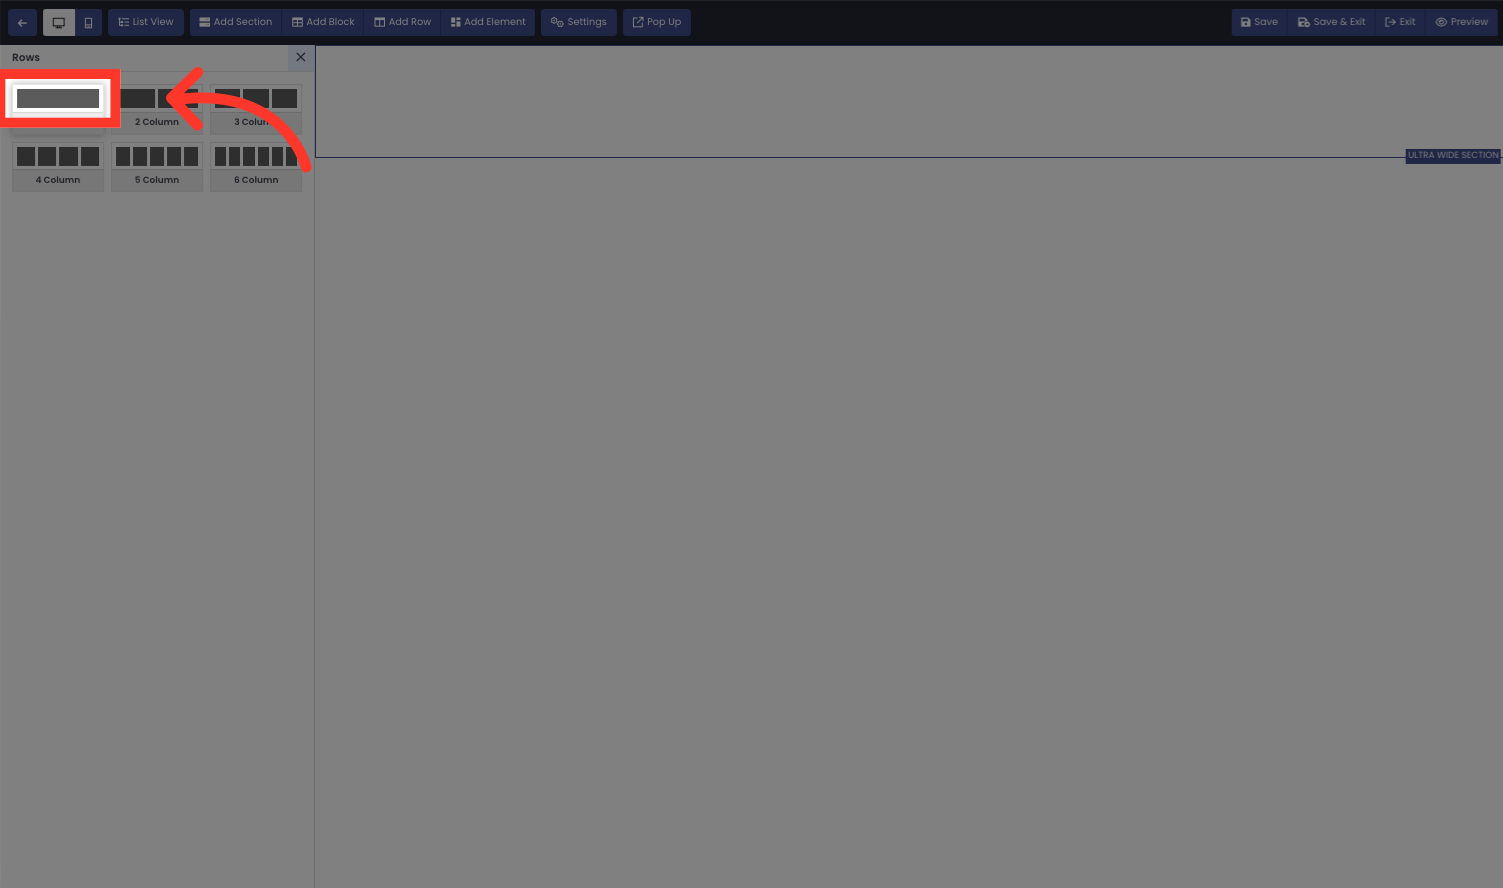
2. Click "Add Row"
Add a new row to the menu.

3. Select how many rows you want to add. For this demo we choose one row (You can add two rows if you want to add a logo or three rows if you want to add a logo menu and phone number.)
Select how many rows you want to add. For this demo we choose one row (You can add two rows if you want to add a logo or three rows if you want to add a logo menu and phone number.)
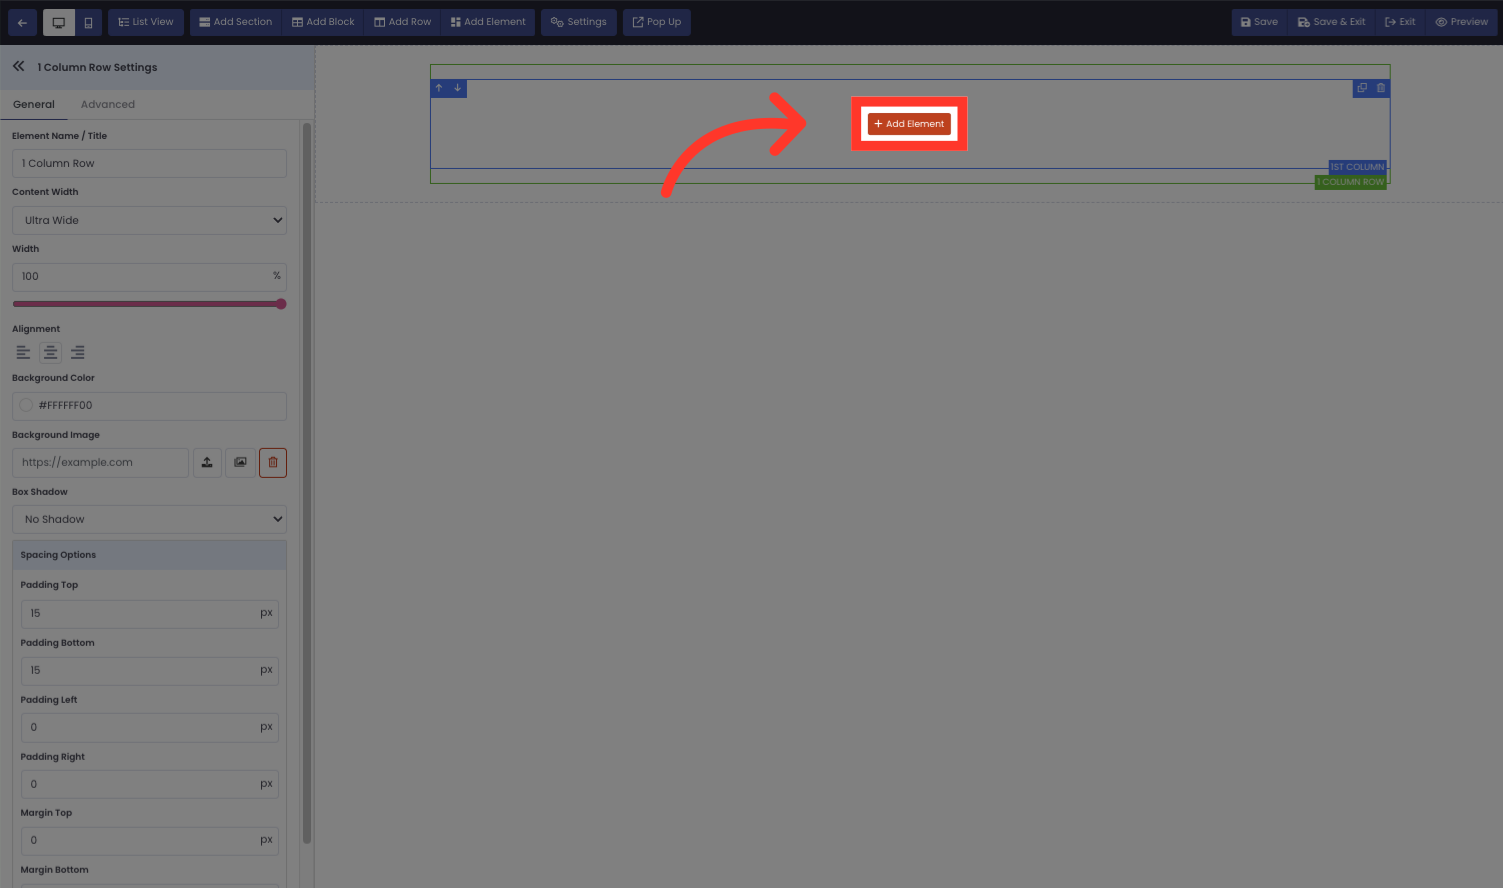
4. Click "Add Element"
Add a new element to the menu.
5. Click "Navigation"
Access the navigation element.

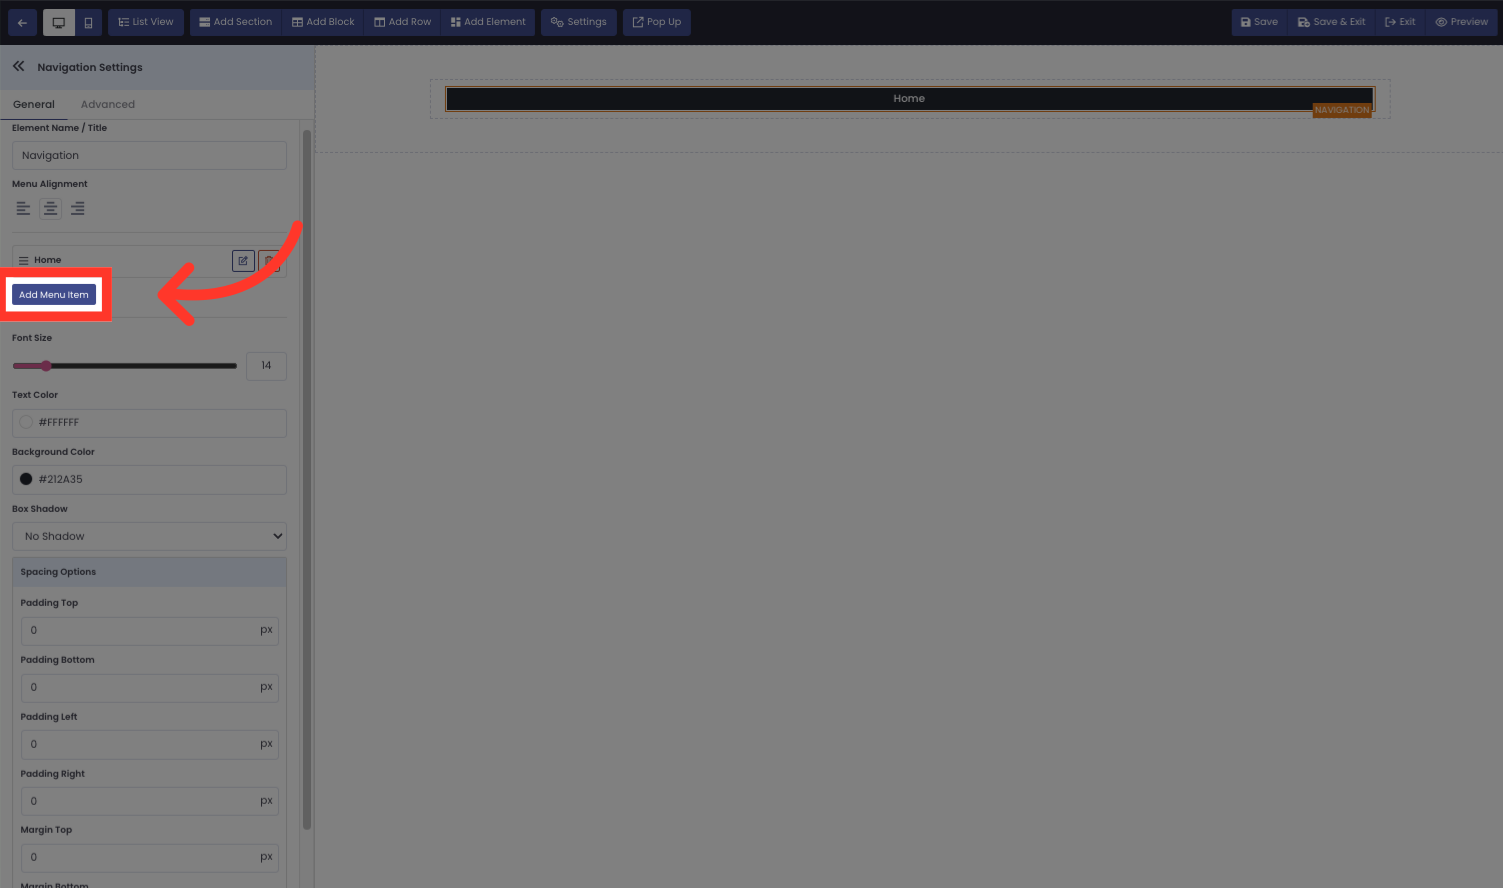
6. Click "Add Menu Item"
Add a new item to the menu.
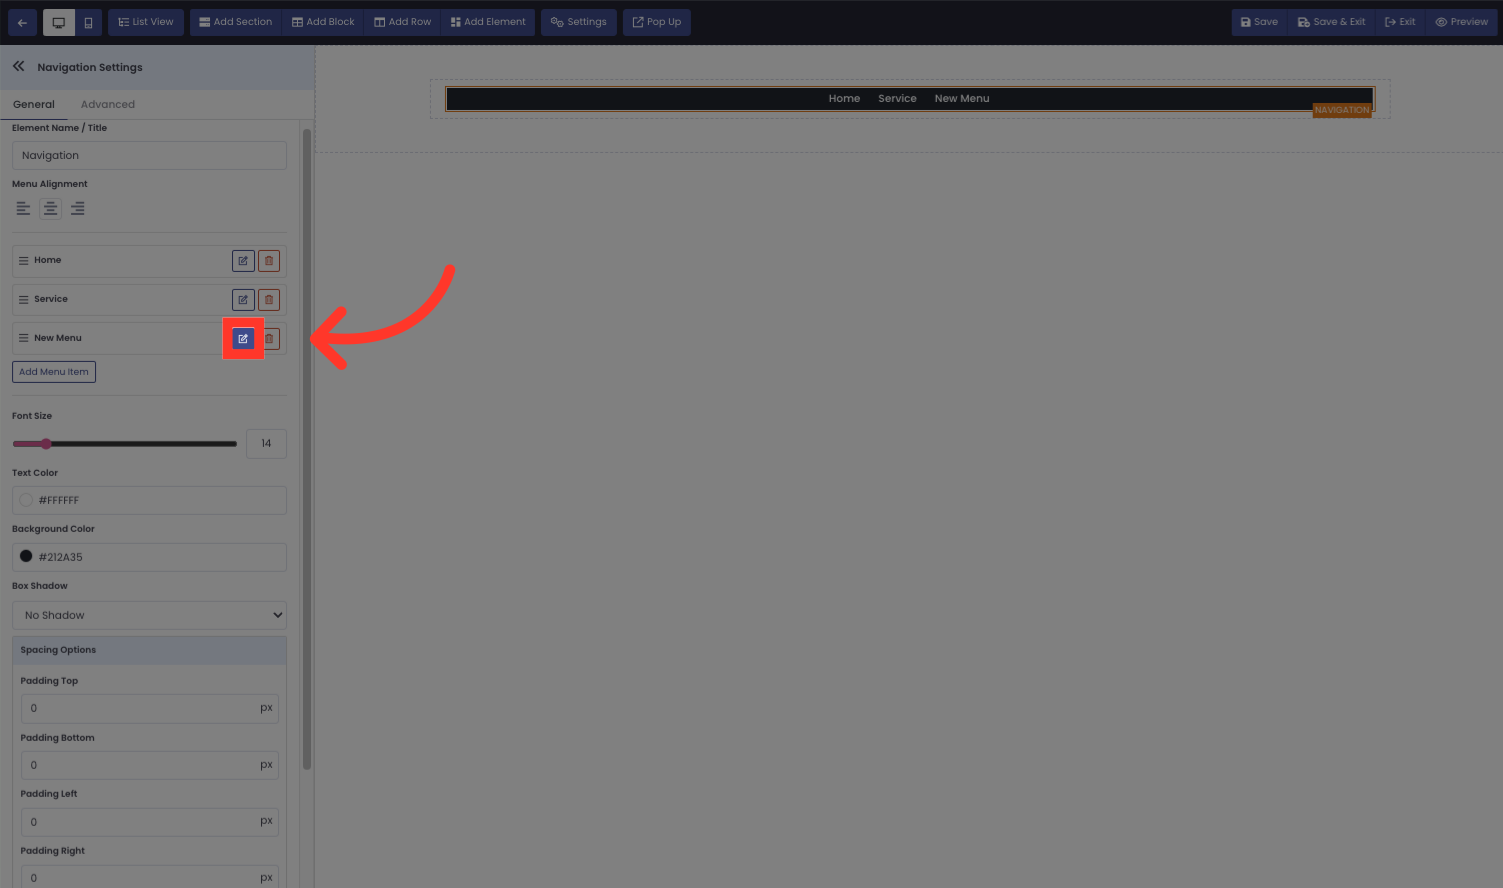
7. Click Edit to add the menu item you want.
Click the edit button

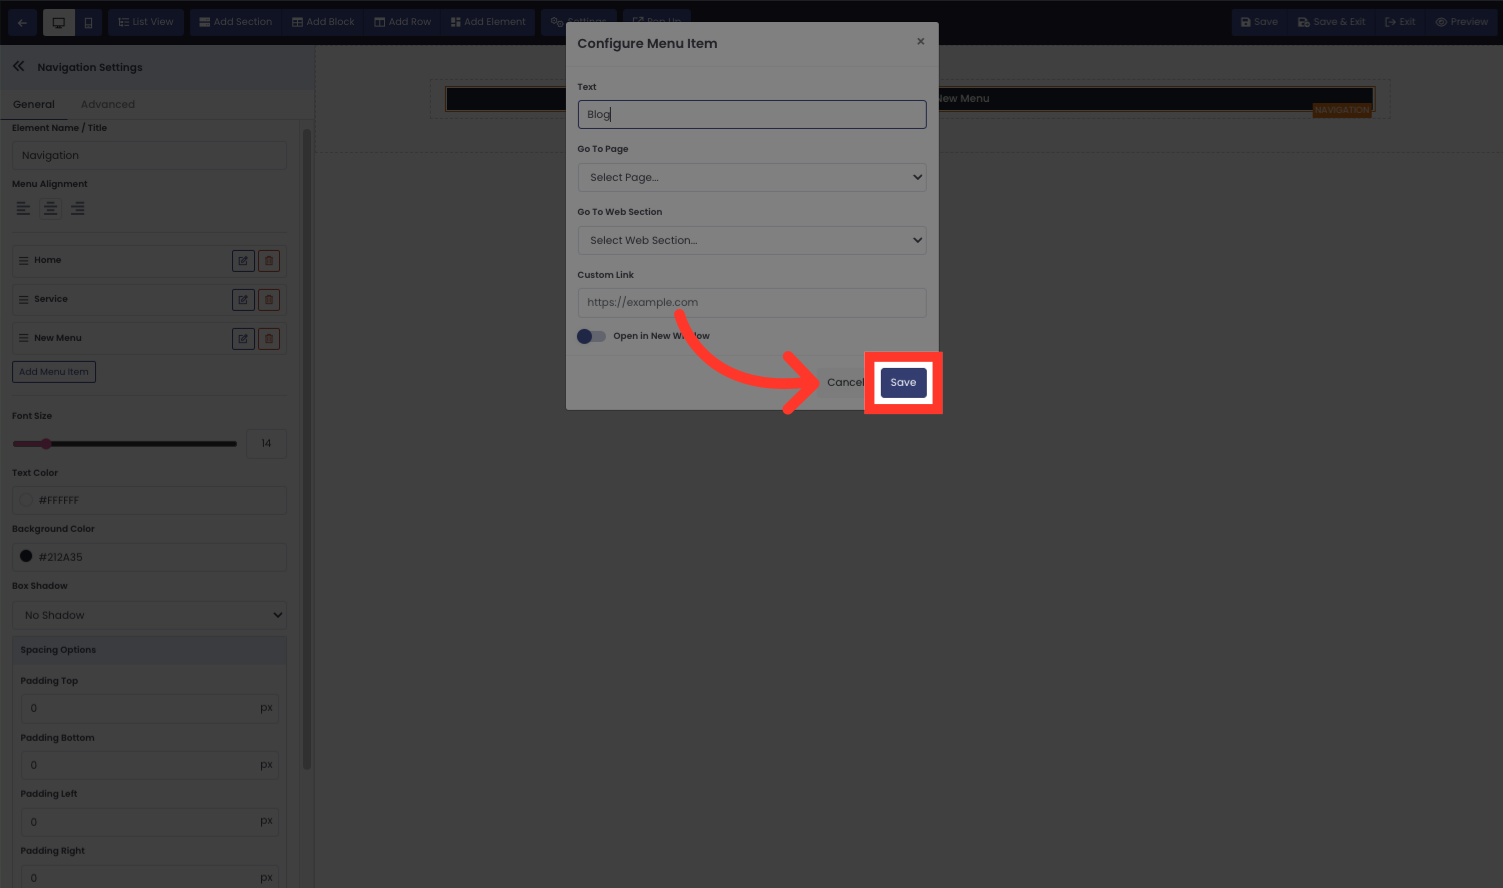
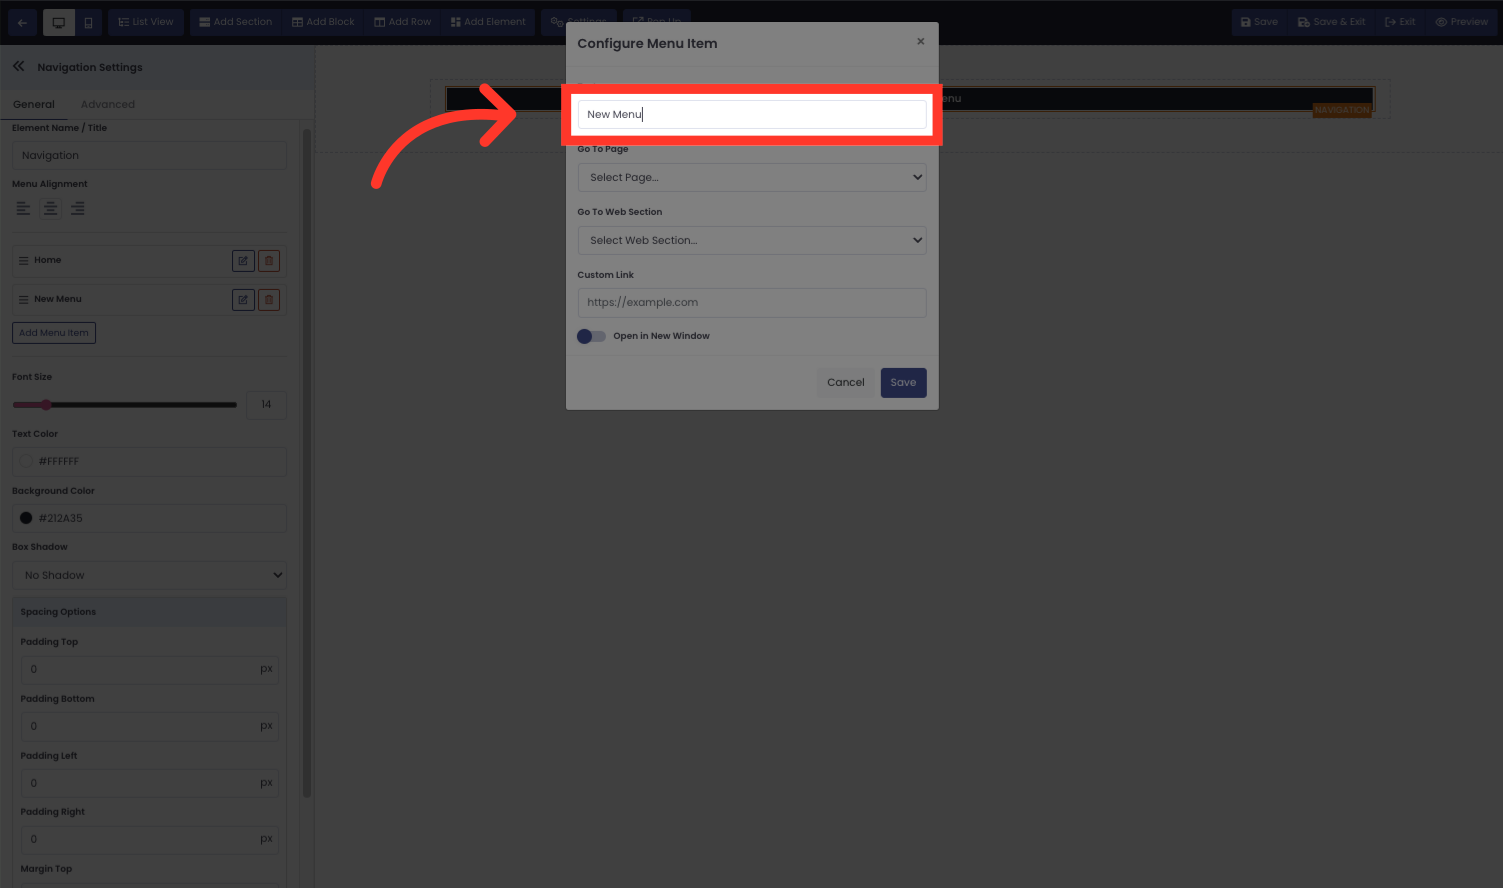
8. Name your menu Item.
Name your menu Item.
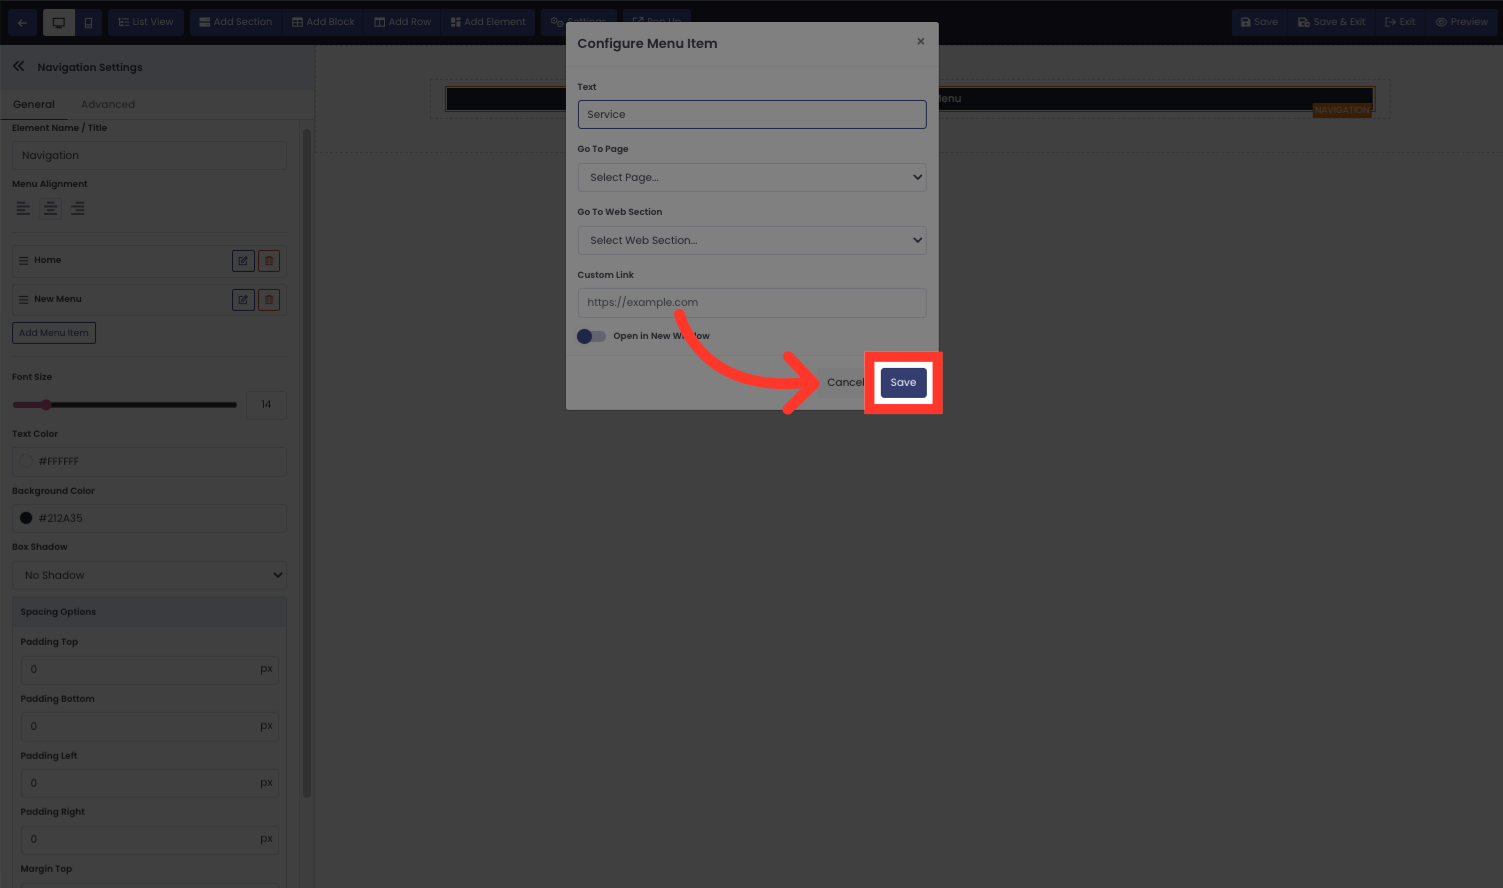
9. Click "Save"
Save the changes made.
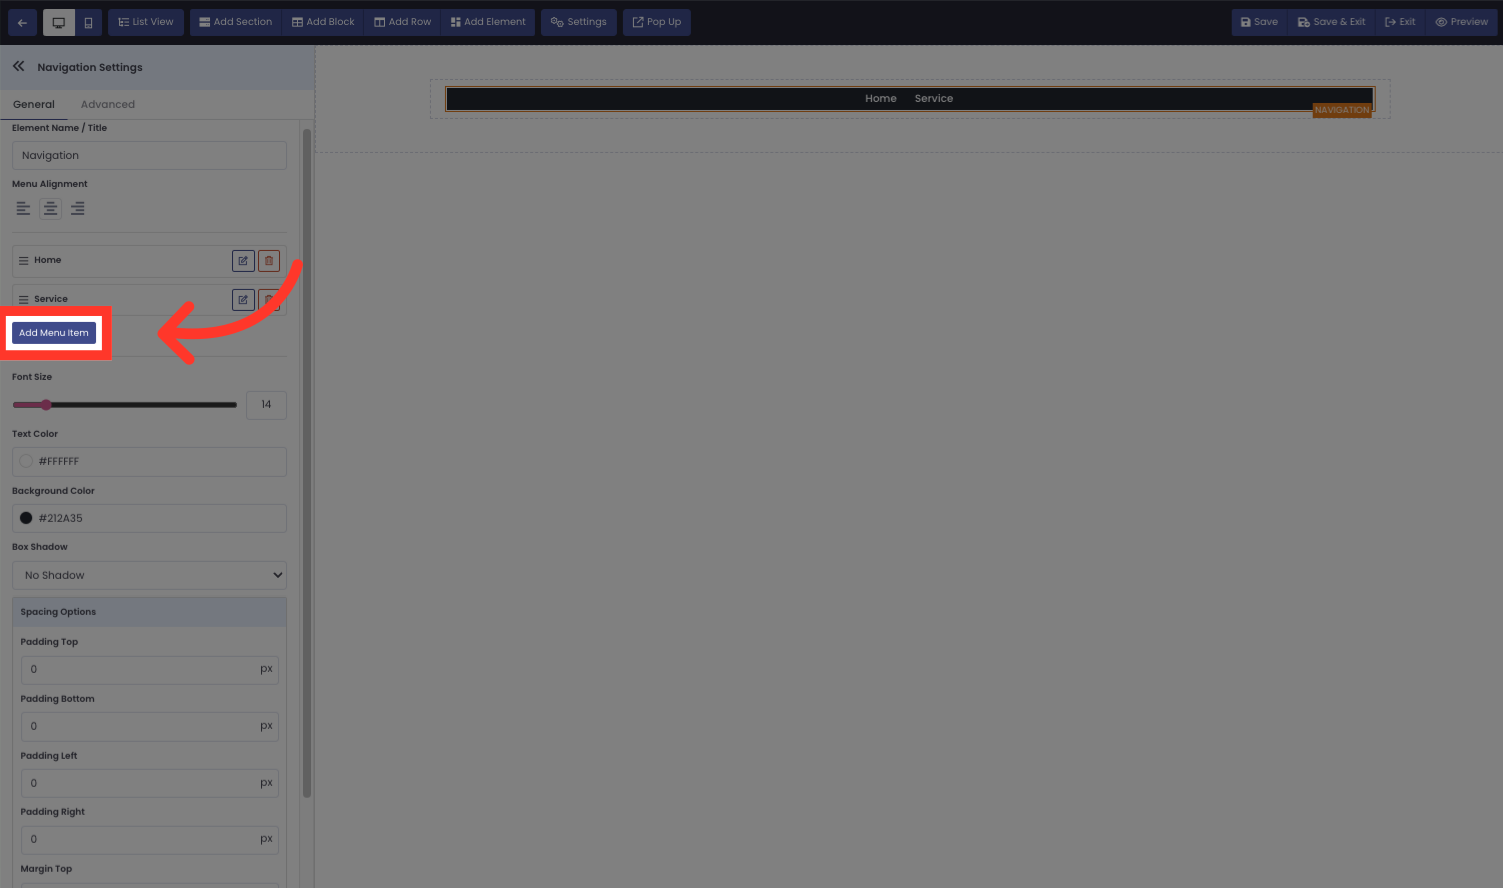
10. Click "Add Menu Item"
Add a new item to the menu.
11. Click Edit to add the menu item you want
Click Edit to add the menu item you want
12. Name your menu Item.
Name your menu Item.

13. Click "Save"
Save the changes made.